
Building An Interview Study
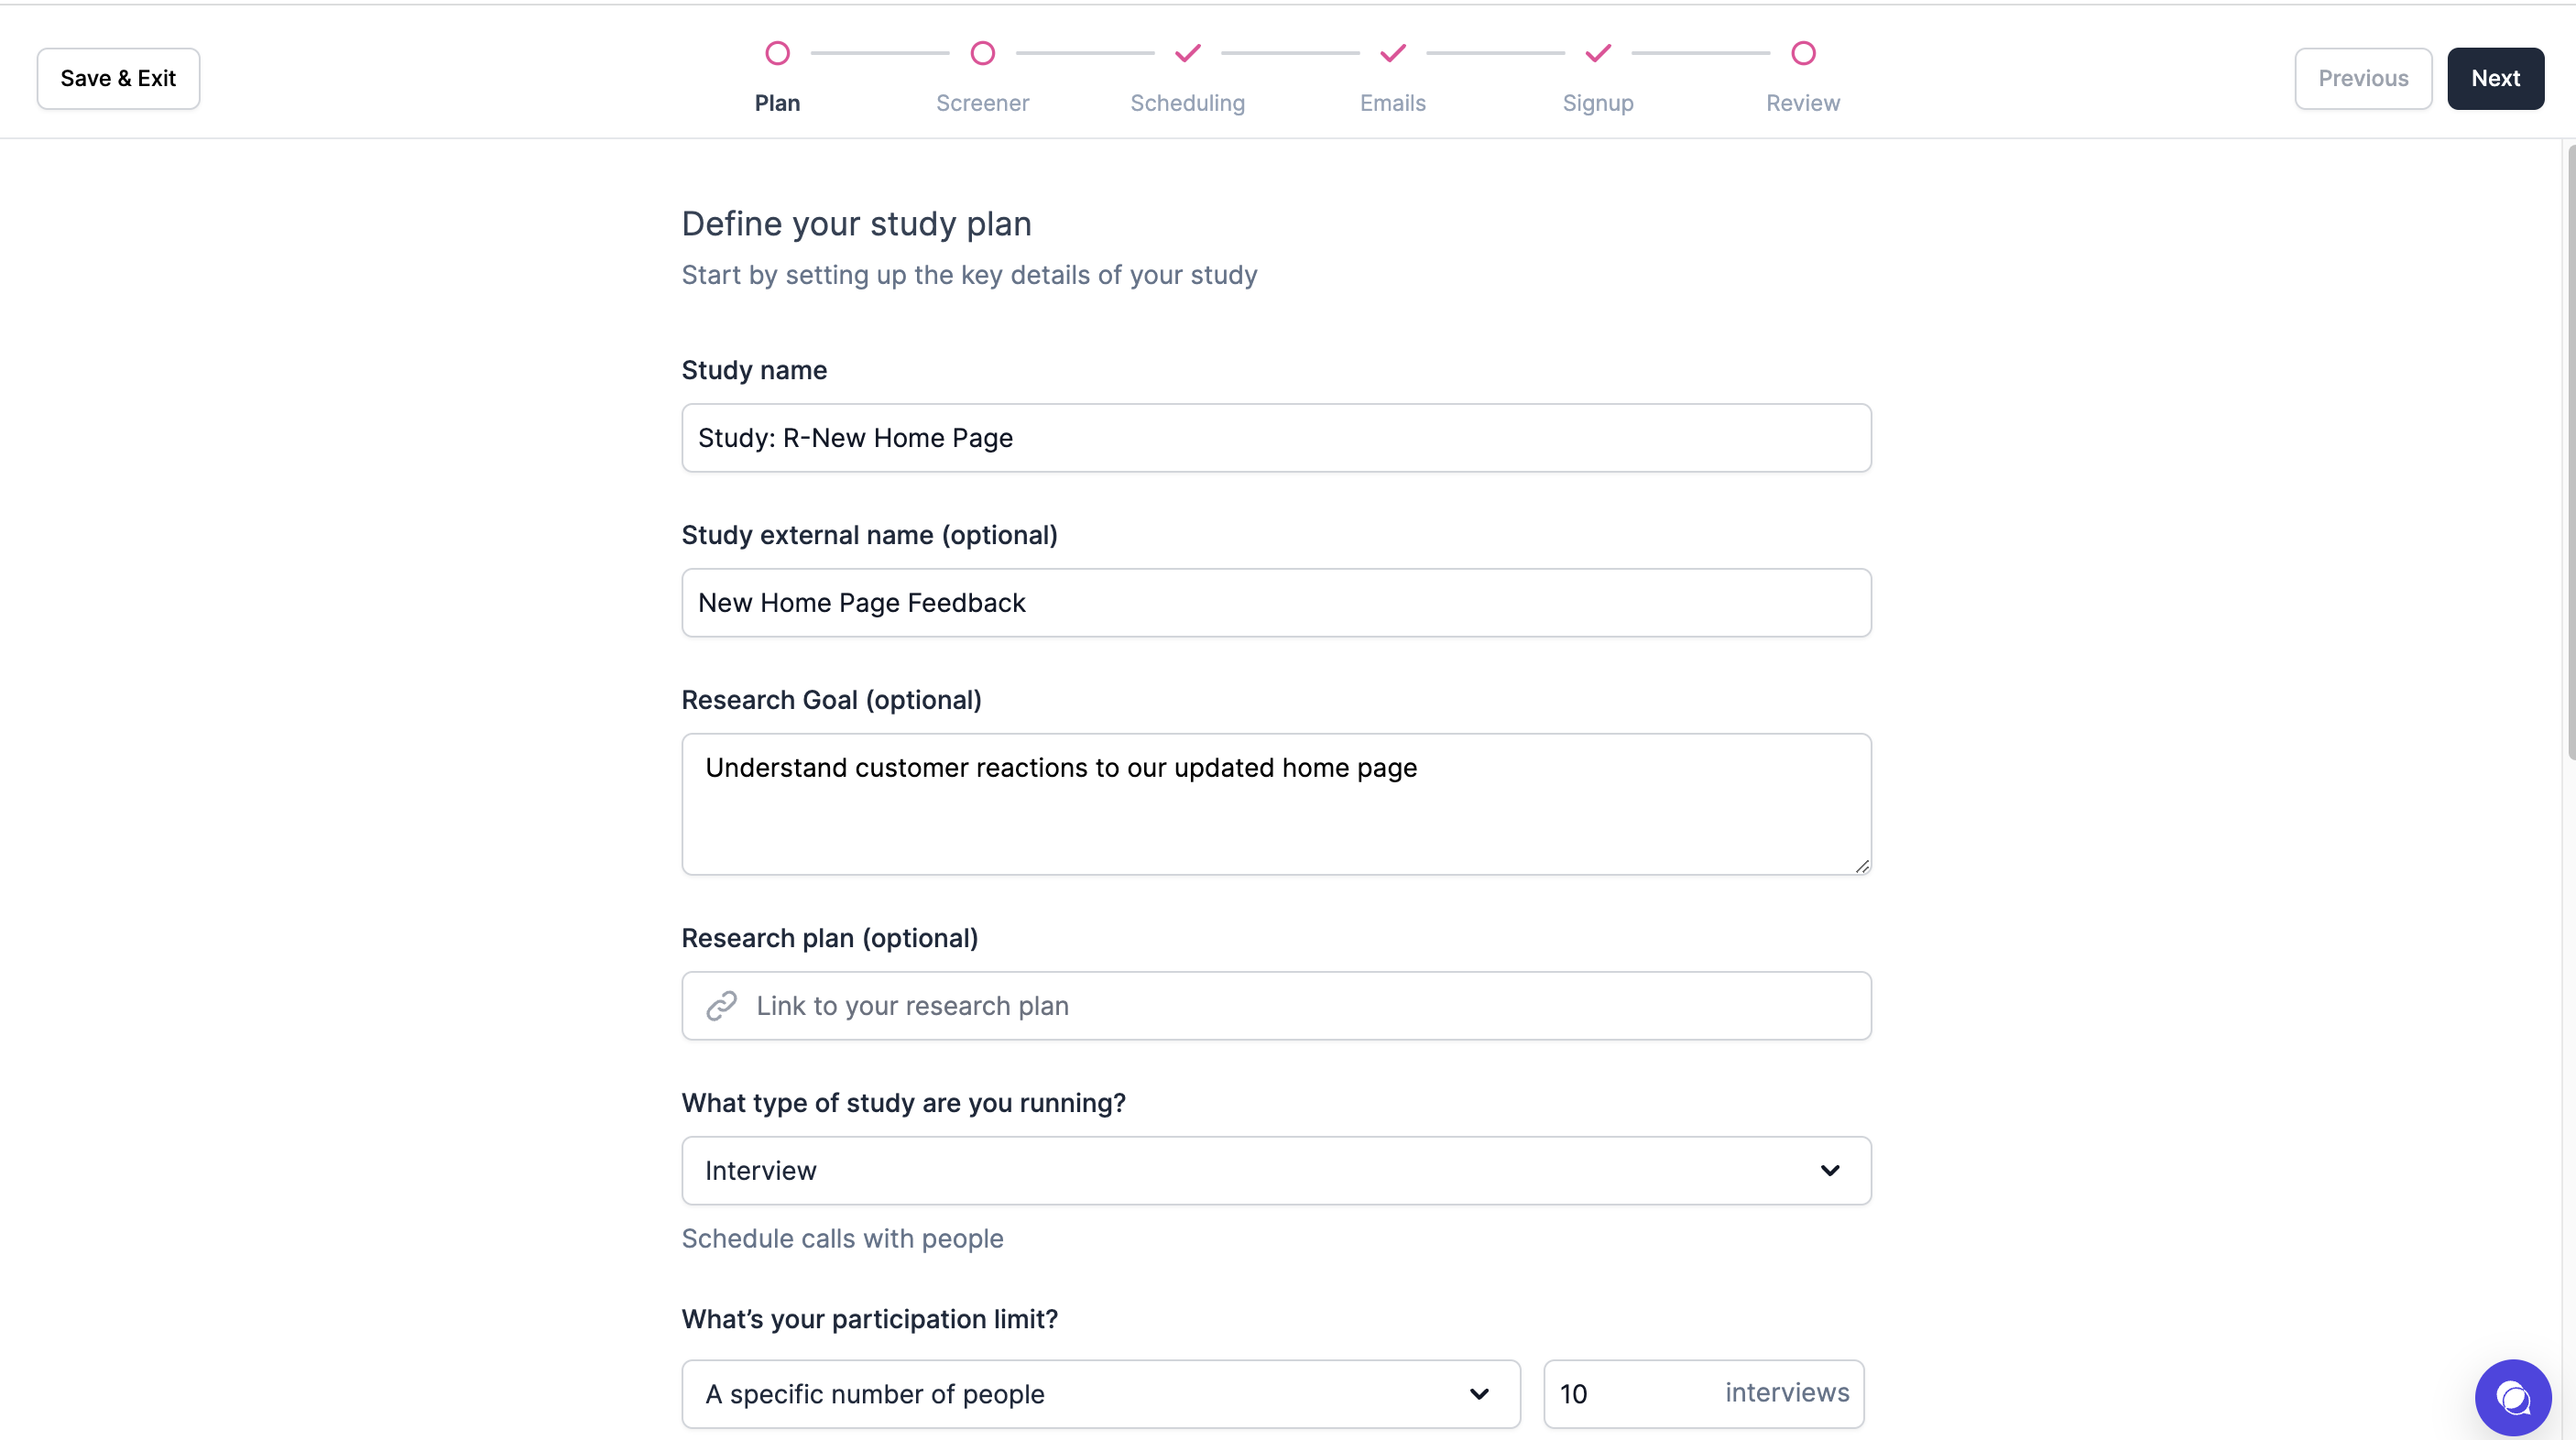
Plan
Start by setting up the key details of your study.
- Study name: Give your study a clear and descriptive name to easily identify it in your workspace.
- Study external name (optional): If you have an external name or code for your study, you can add it here for reference.
- Research Goal (optional; internal): Define the specific goal or objective of your research study to guide your team.
- Research plan (optional; internal): Provide additional details about your research plan, such as methodology or target audience.
- Study type: Select the 'Interview' study type to continue building this style of research study.
- Participant limit: Set a maximum number of participants for your study or choose to allow unlimited participants for continuous research.
- Consent (optional): You can add a consent form to ensure participants understand and agree to participate in your study. You can also choose the type of consent form and its placement within the signup process.
- Incentive (optional): Specify the amount or reward you will provide to participants for their participation.
- Branding: Personalize your study with your company's logo and brand colors to create a cohesive experience.

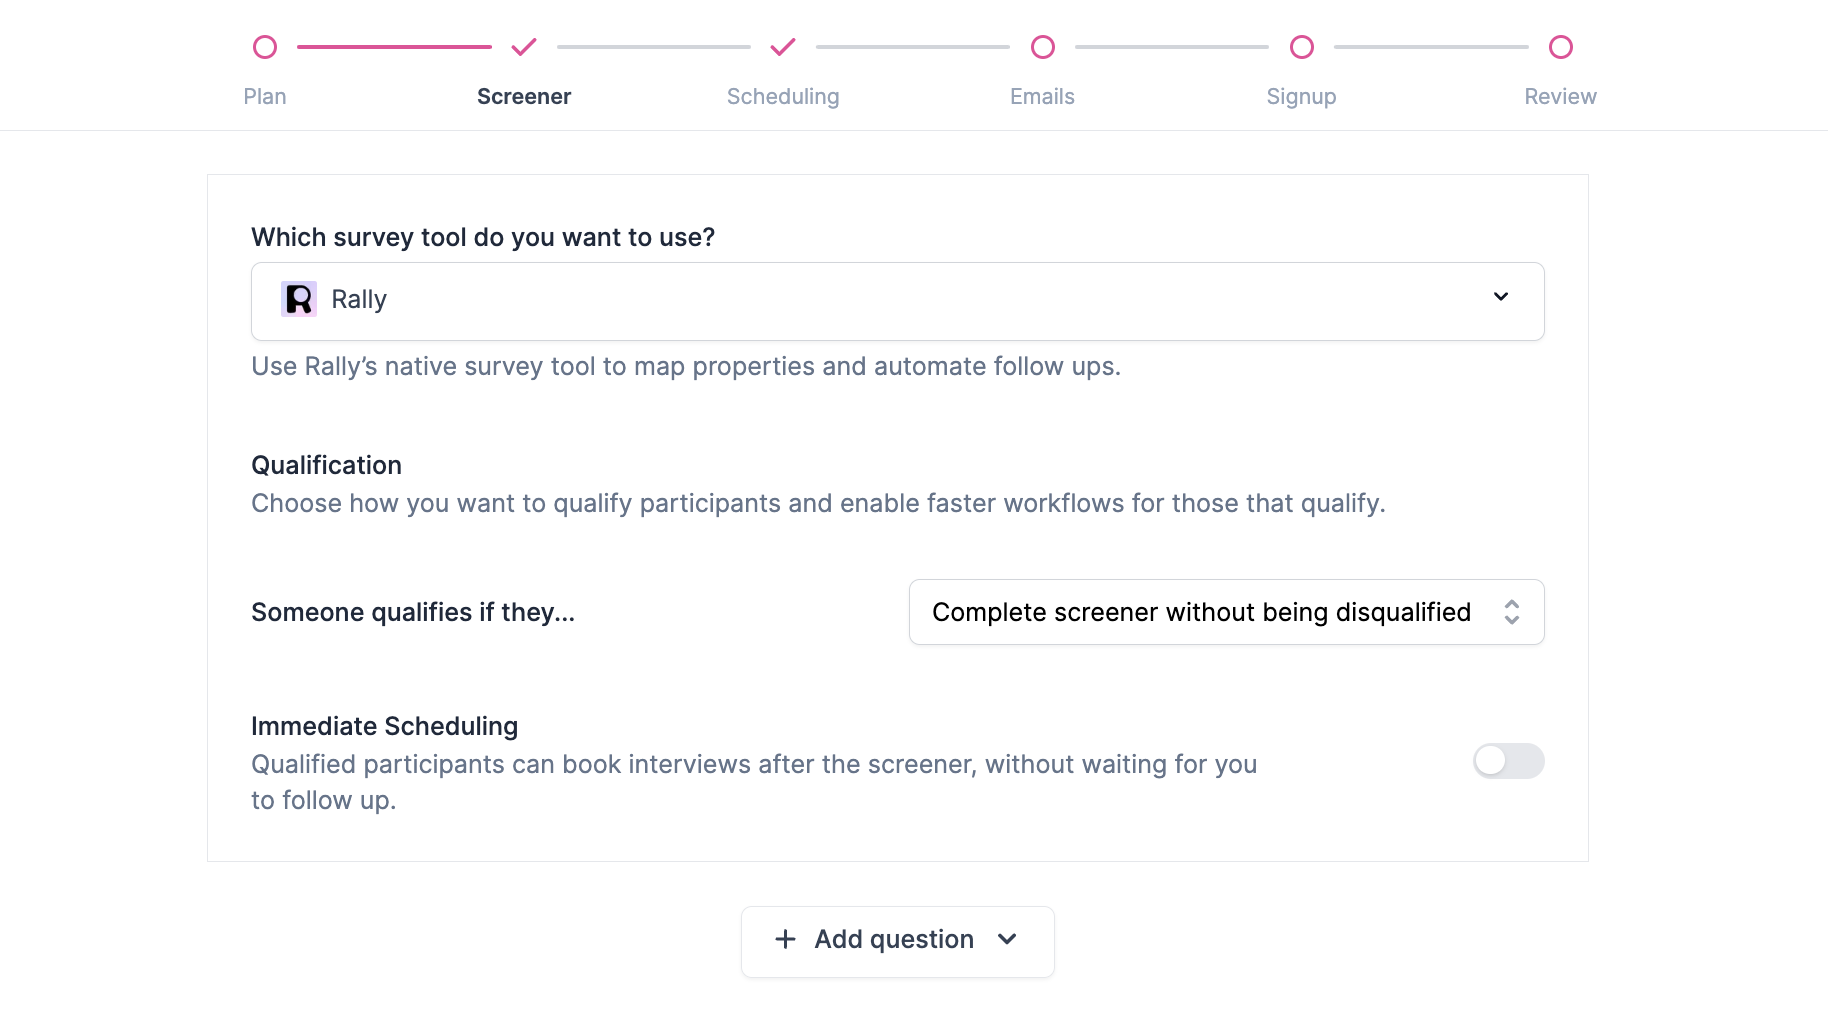
Screener
Ask the right questions and keep your participants engaged to gather the best feedback.
- Survey tool: Select your preferred survey tool. While Rally's native survey tool is recommended for seamless integration with properties and automated follow-ups, you can also choose from our survey integrations: Qualtrics, SurveyMonkey, or Typeform.
- Qualification: Choose your preferred qualification method to streamline the workflow for qualified participants:
- Complete screener without being disqualified: With this option, participants who complete the screener without encountering any auto-disqualifying answers will automatically qualify for the study.
- Have a qualifying answer to specific questions: With this option, you can set specific questions in the screener that will automatically qualify participants based on their answers.
- Immediate scheduling (optional): Allow qualified participants to book interviews after completing the screener, without waiting for you to follow up.
- Build Screener: Create your screener by adding questions and implementing conditional logic to tailor the screening process.
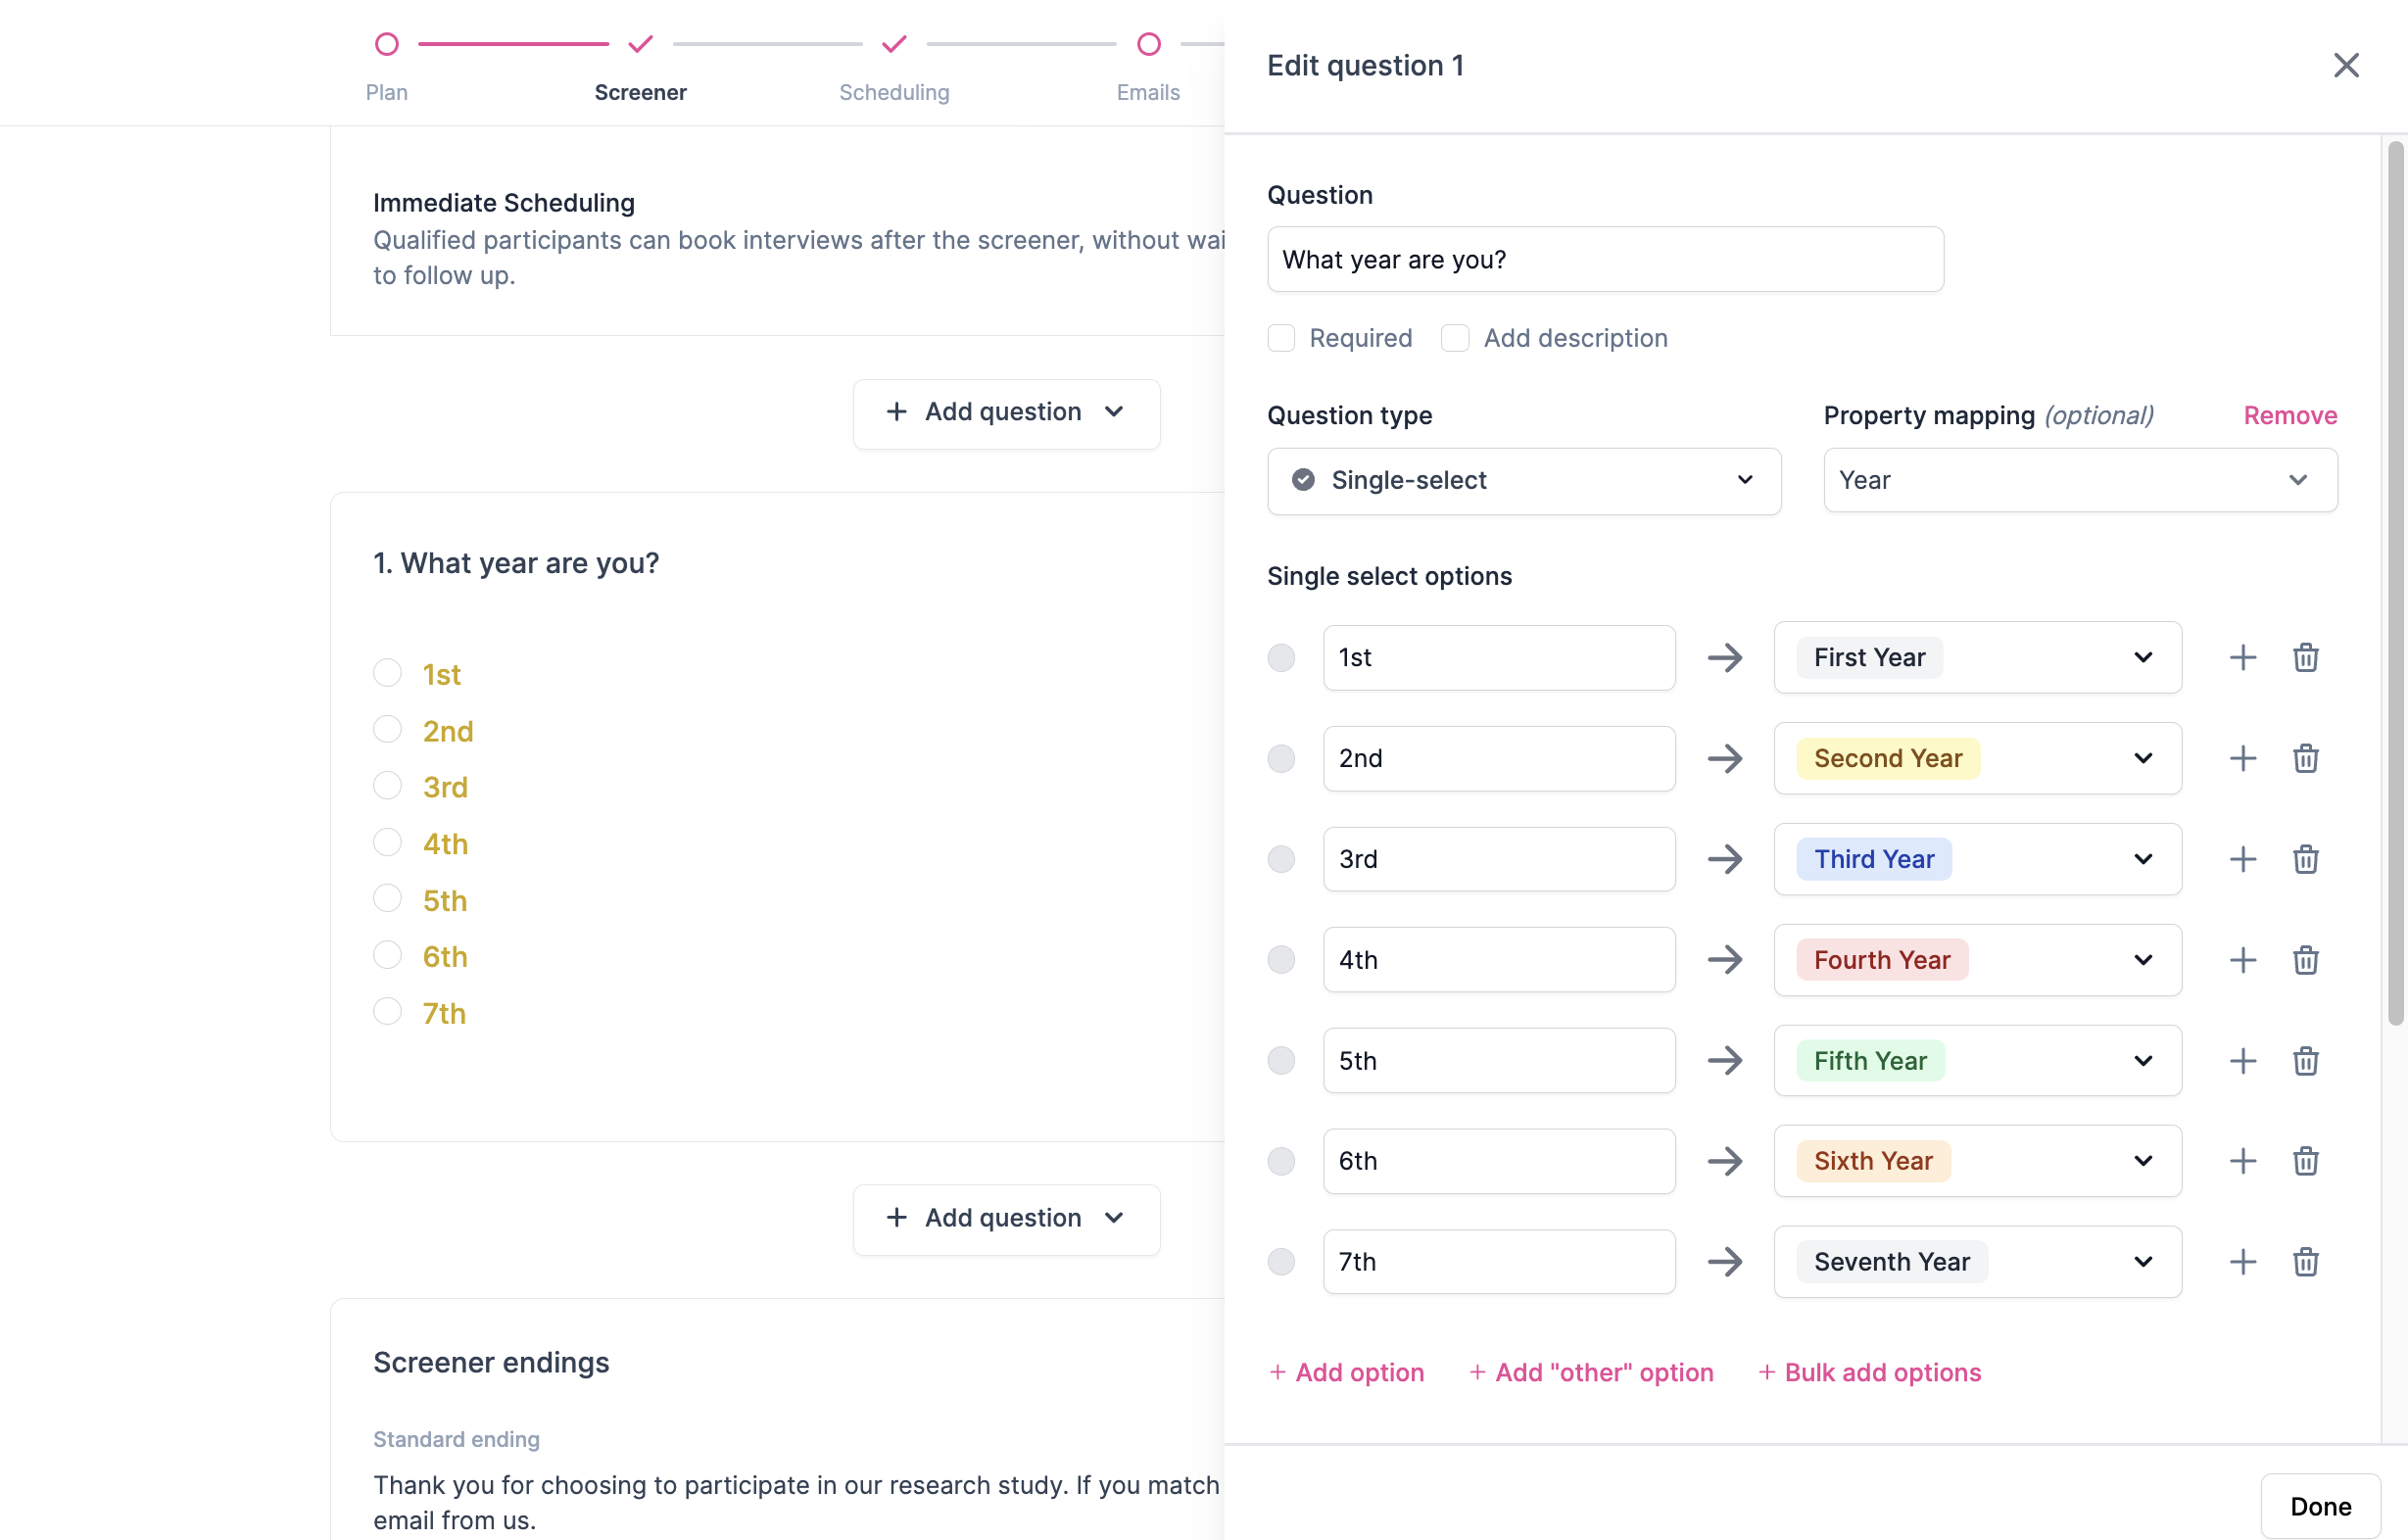
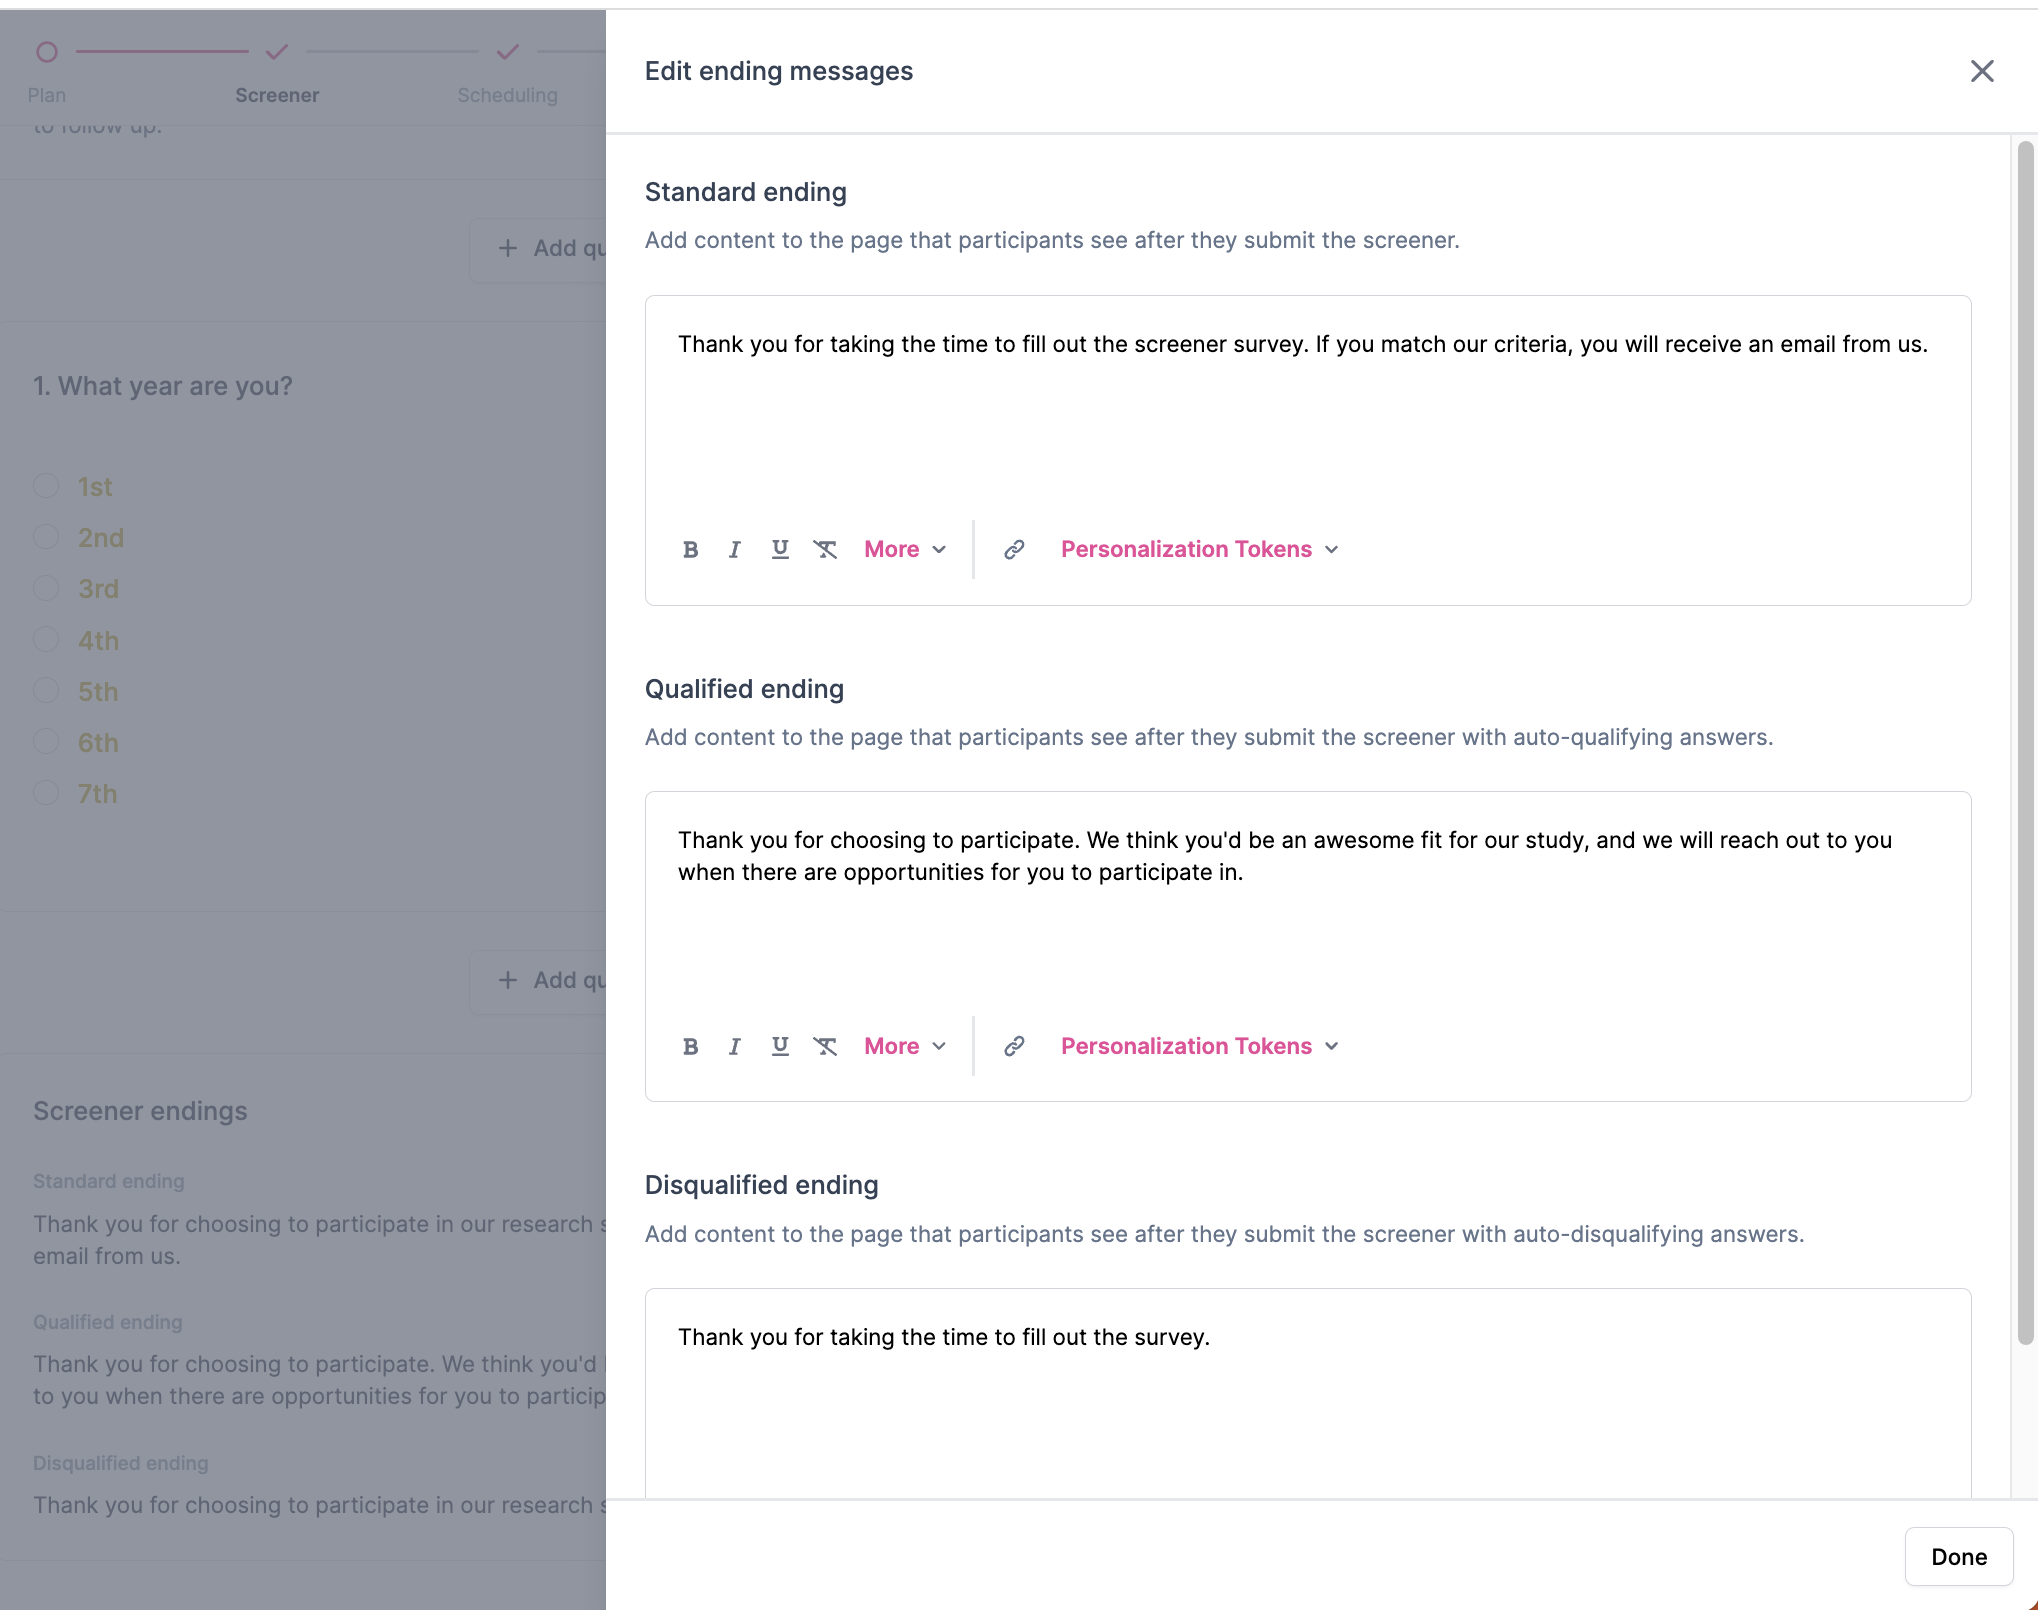
- Screener endings: Customize messages for participants based on their qualification status
- Standard: A general message that participants see after they submit the screener.
- Example: "Thank you for taking the time to fill out the screener survey. If you match our criteria, you will receive an email from us."
- Qualified: A message that participants see after they submit the screener with auto-qualifying answers.
- Example: "Thank you for choosing to participate. We think you'd be an awesome fit for our study, and we will reach out to you when there are opportunities for you to participate in."
- Disqualified: A message that participants see after they submit the screener with auto-disqualifying answers.
- Example: "Thank you for taking the time to fill out the survey."
- Standard: A general message that participants see after they submit the screener.
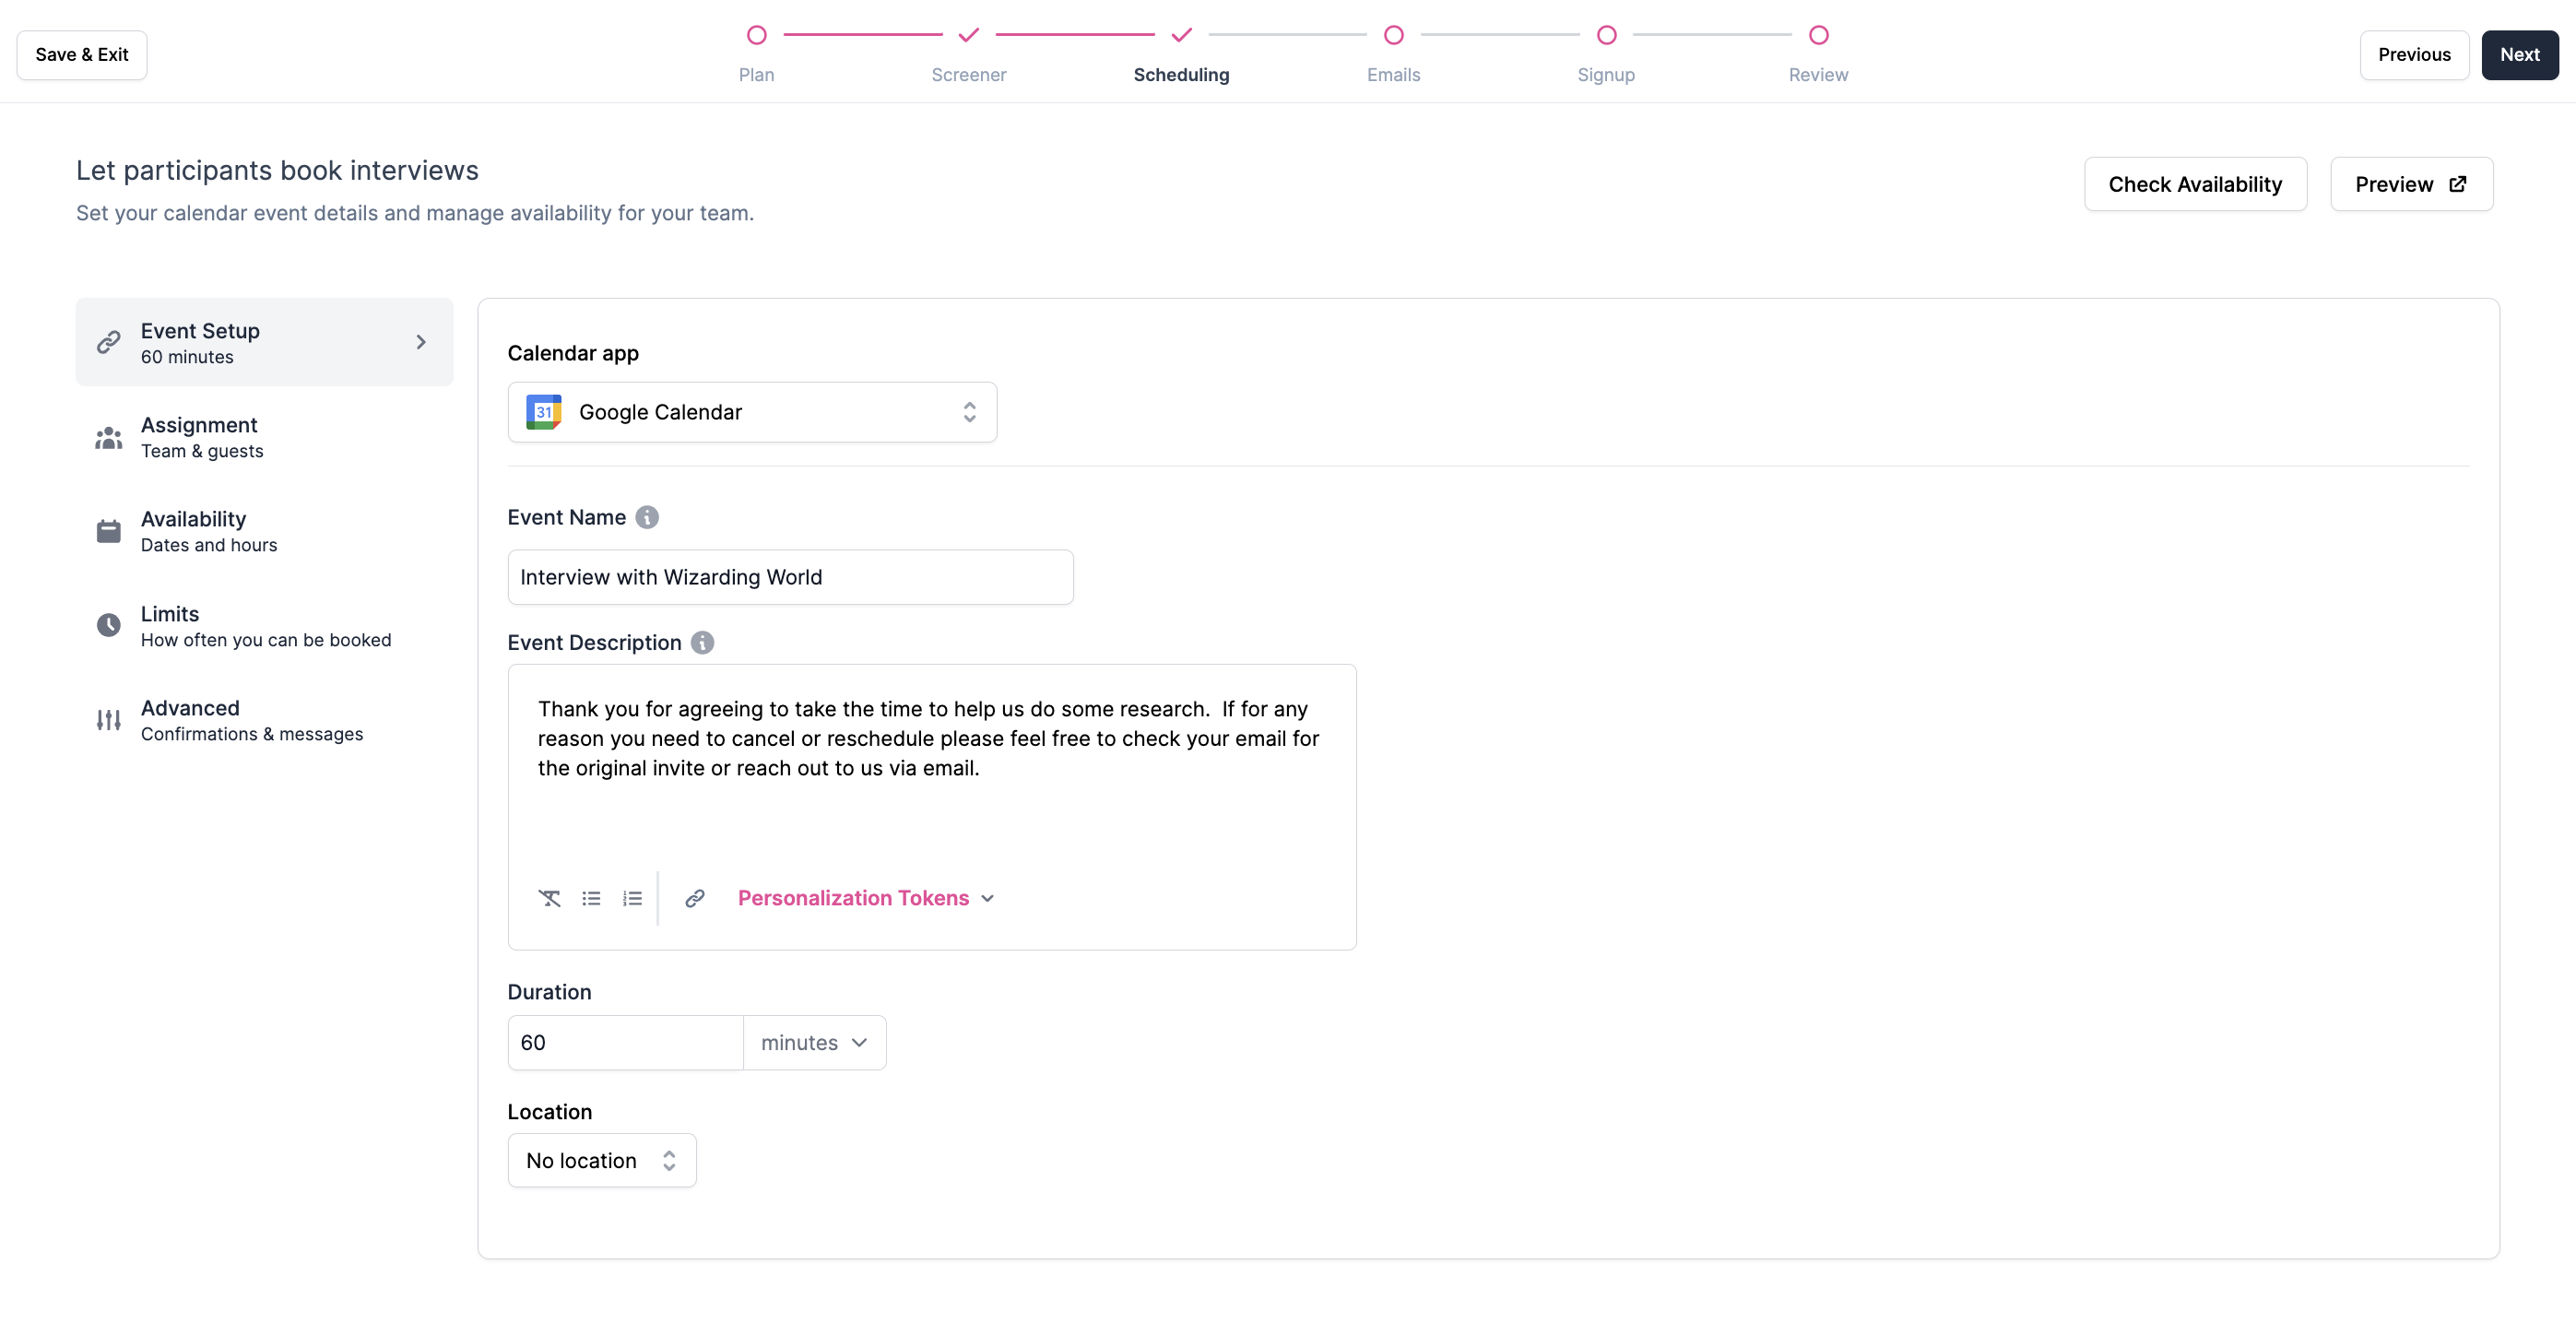
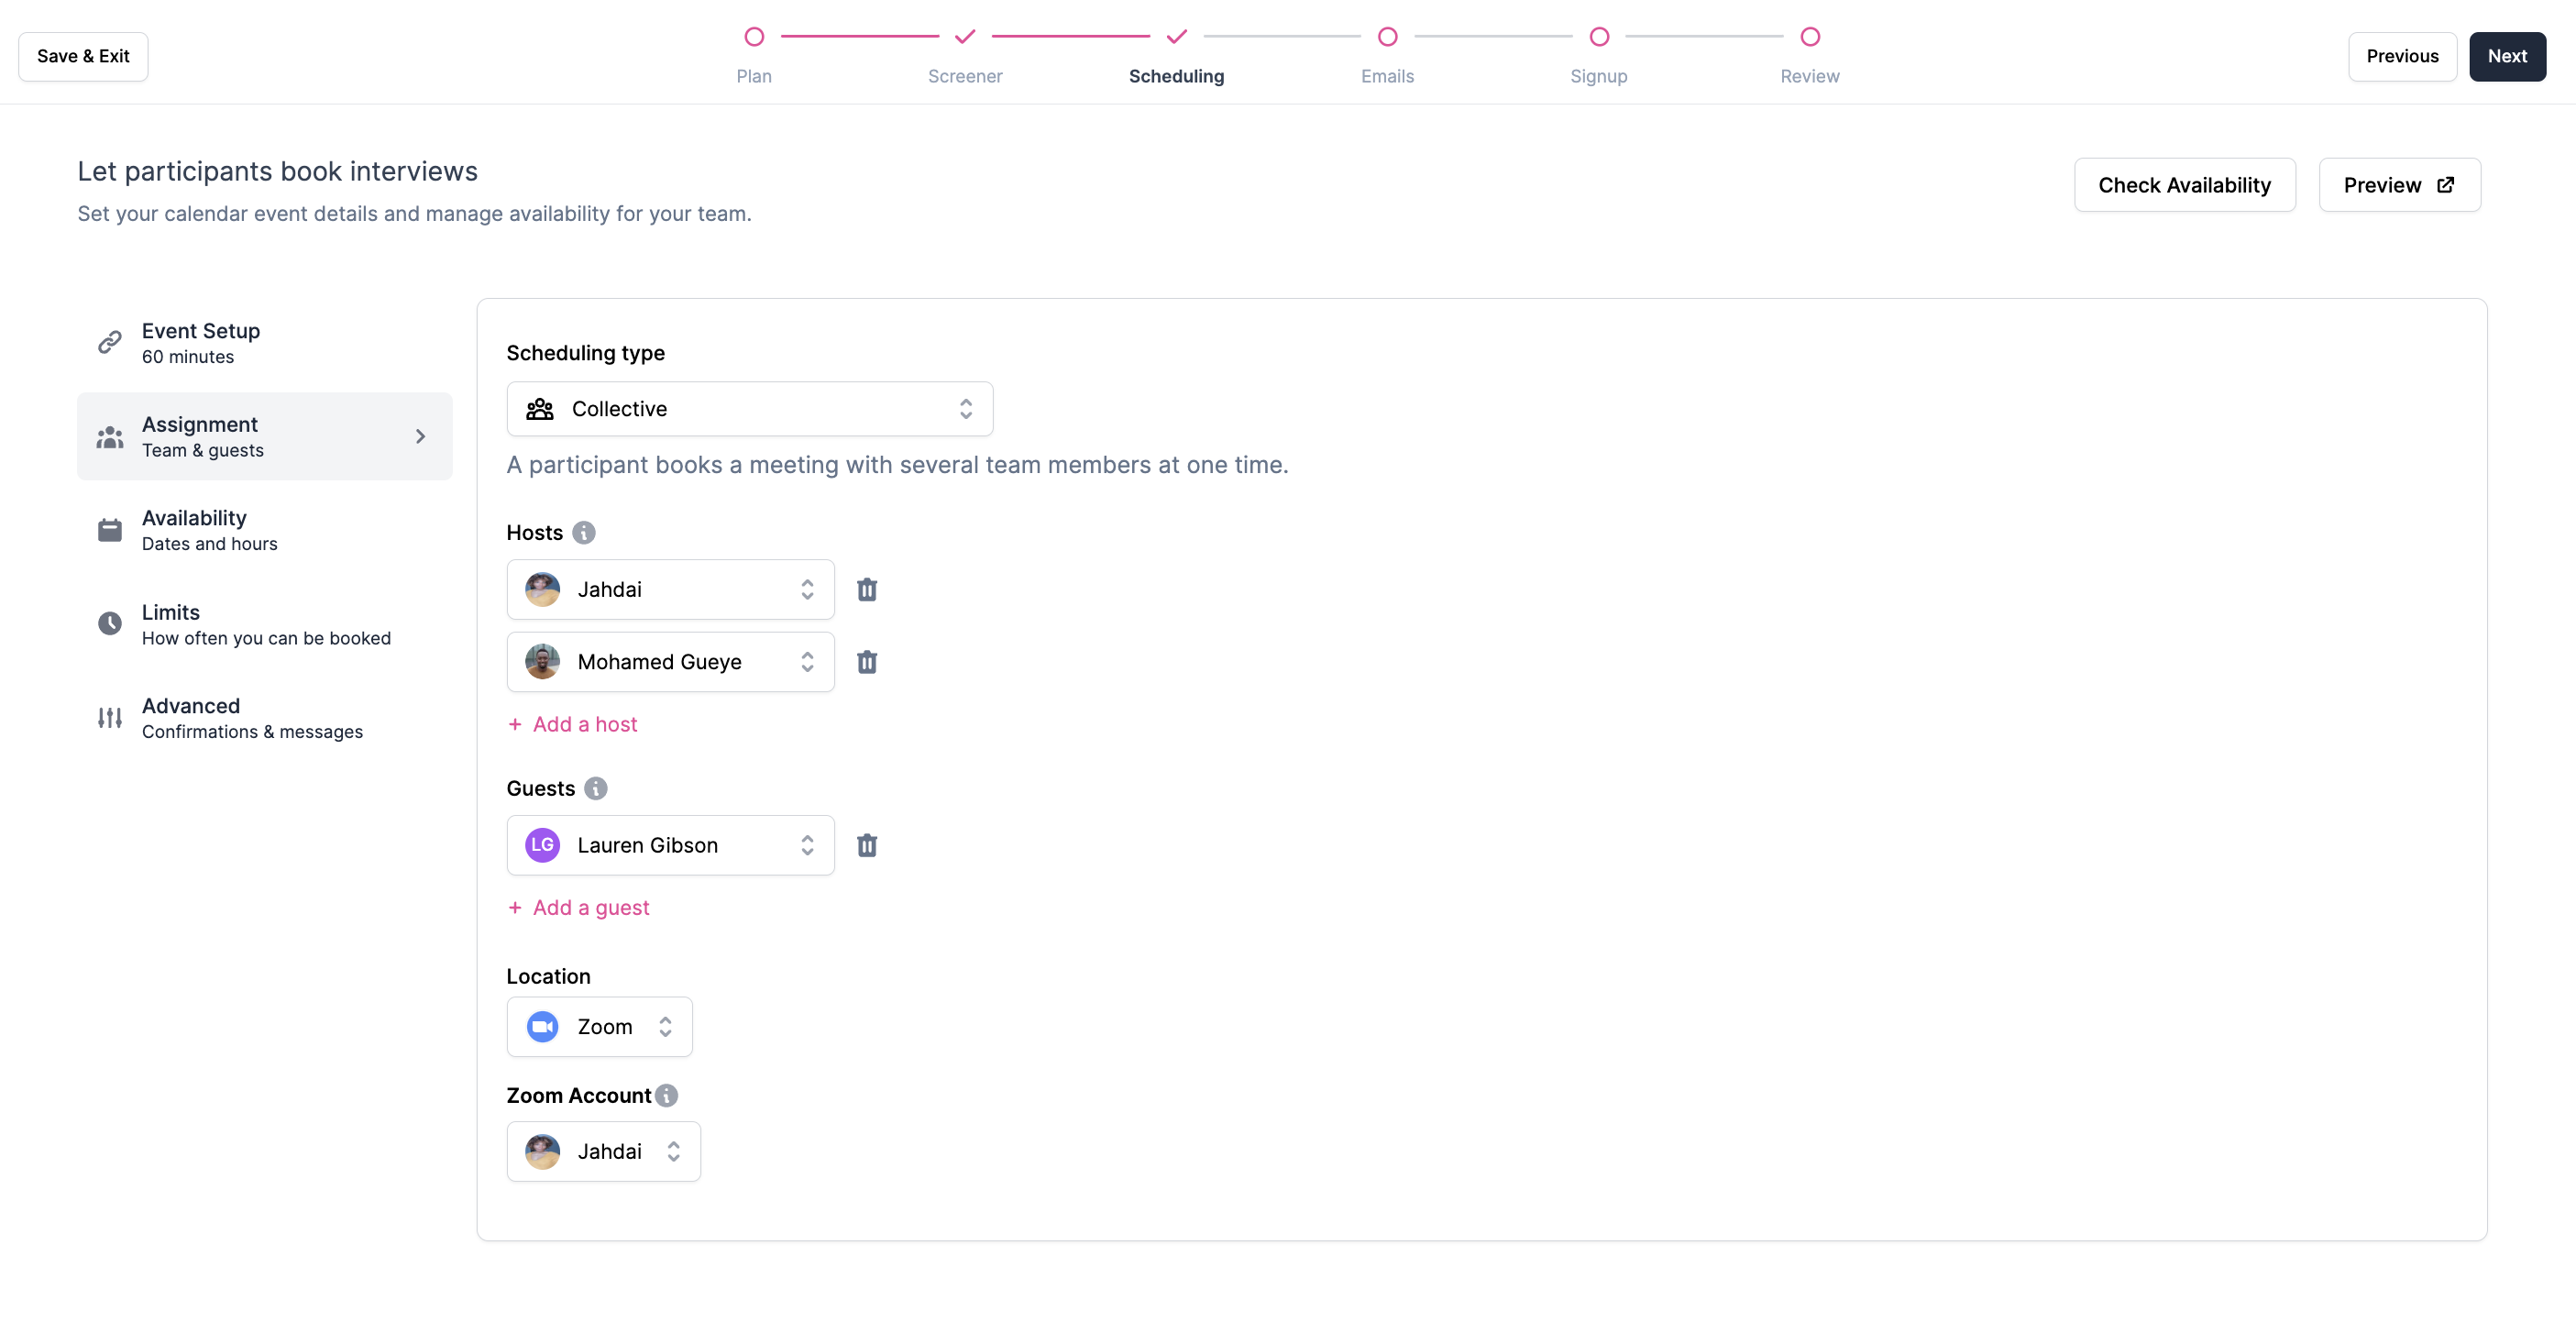
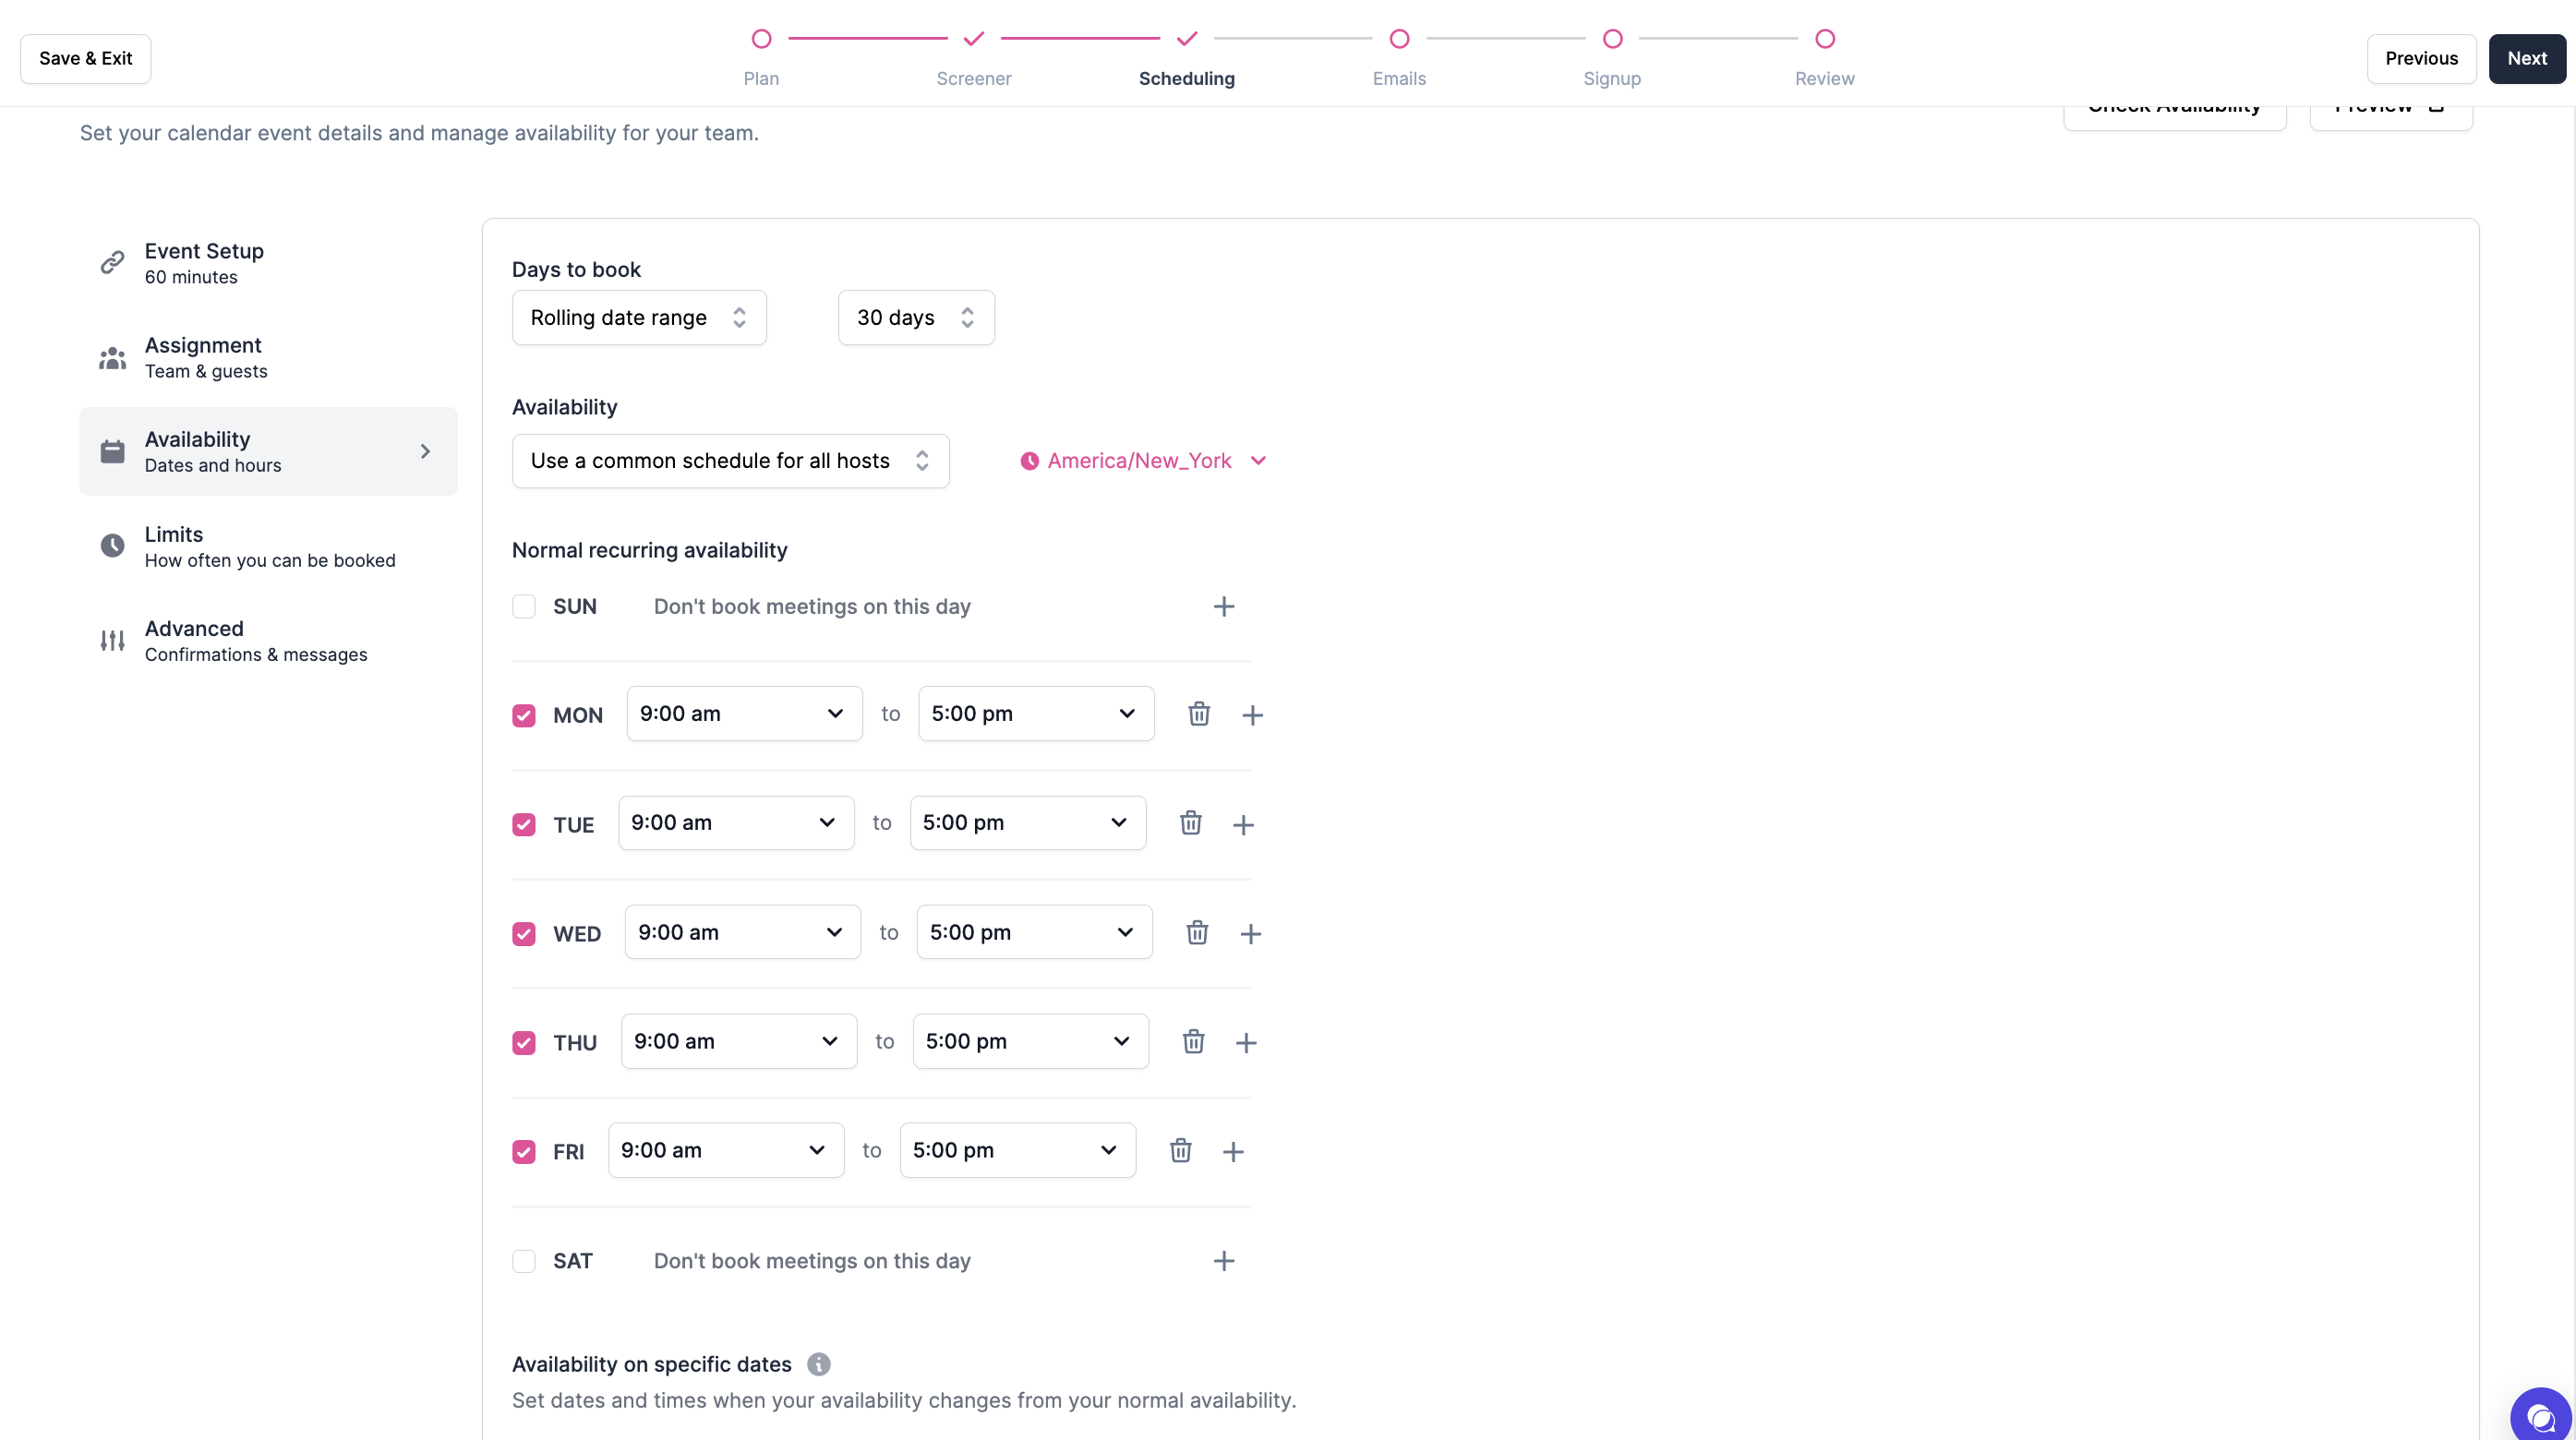
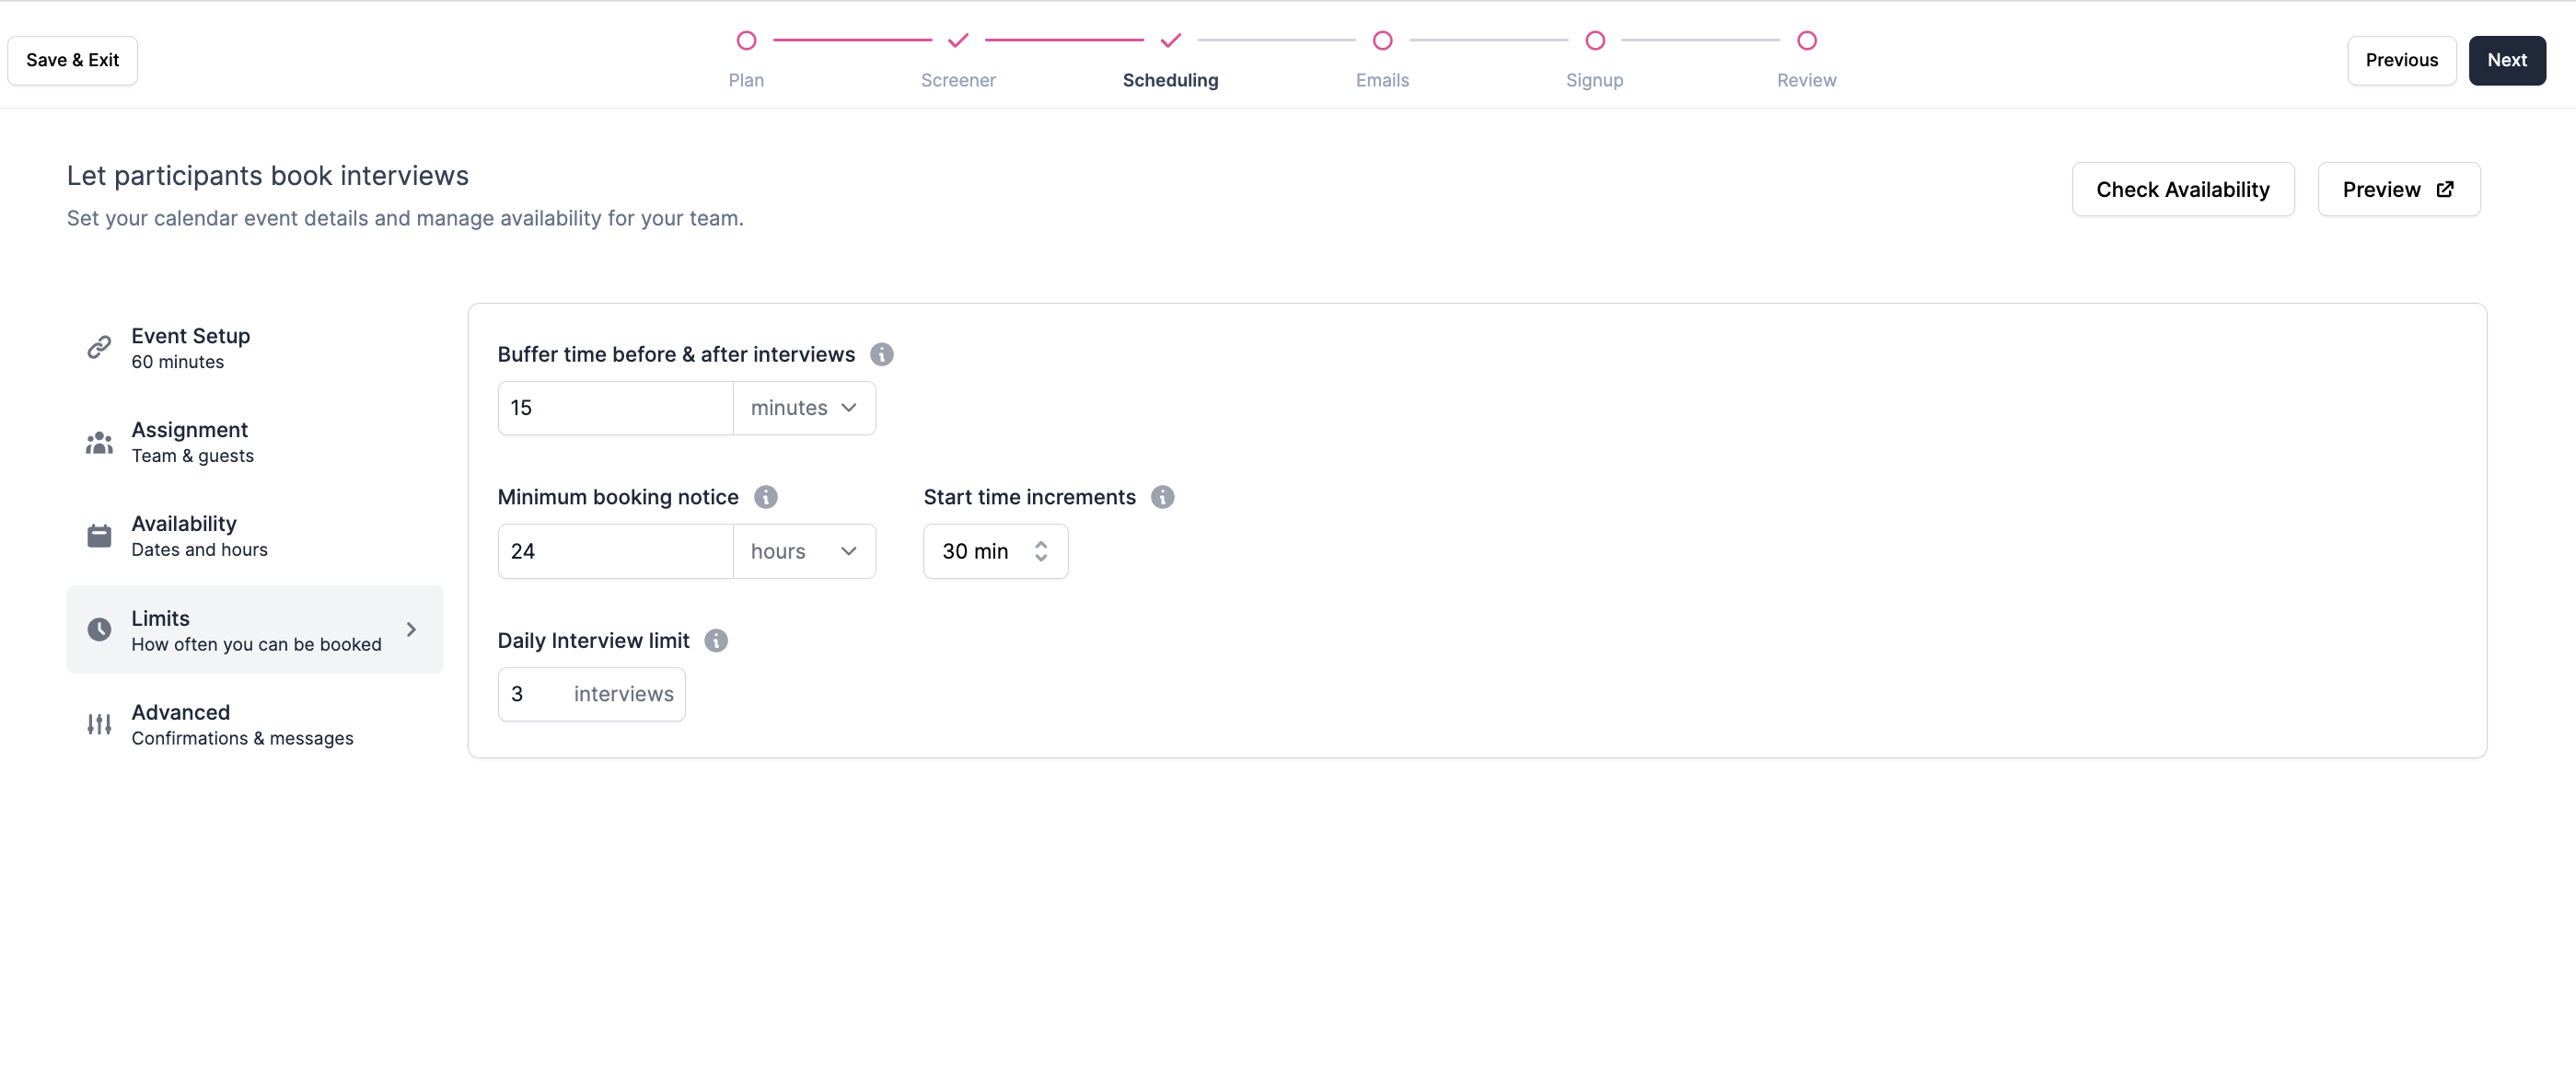
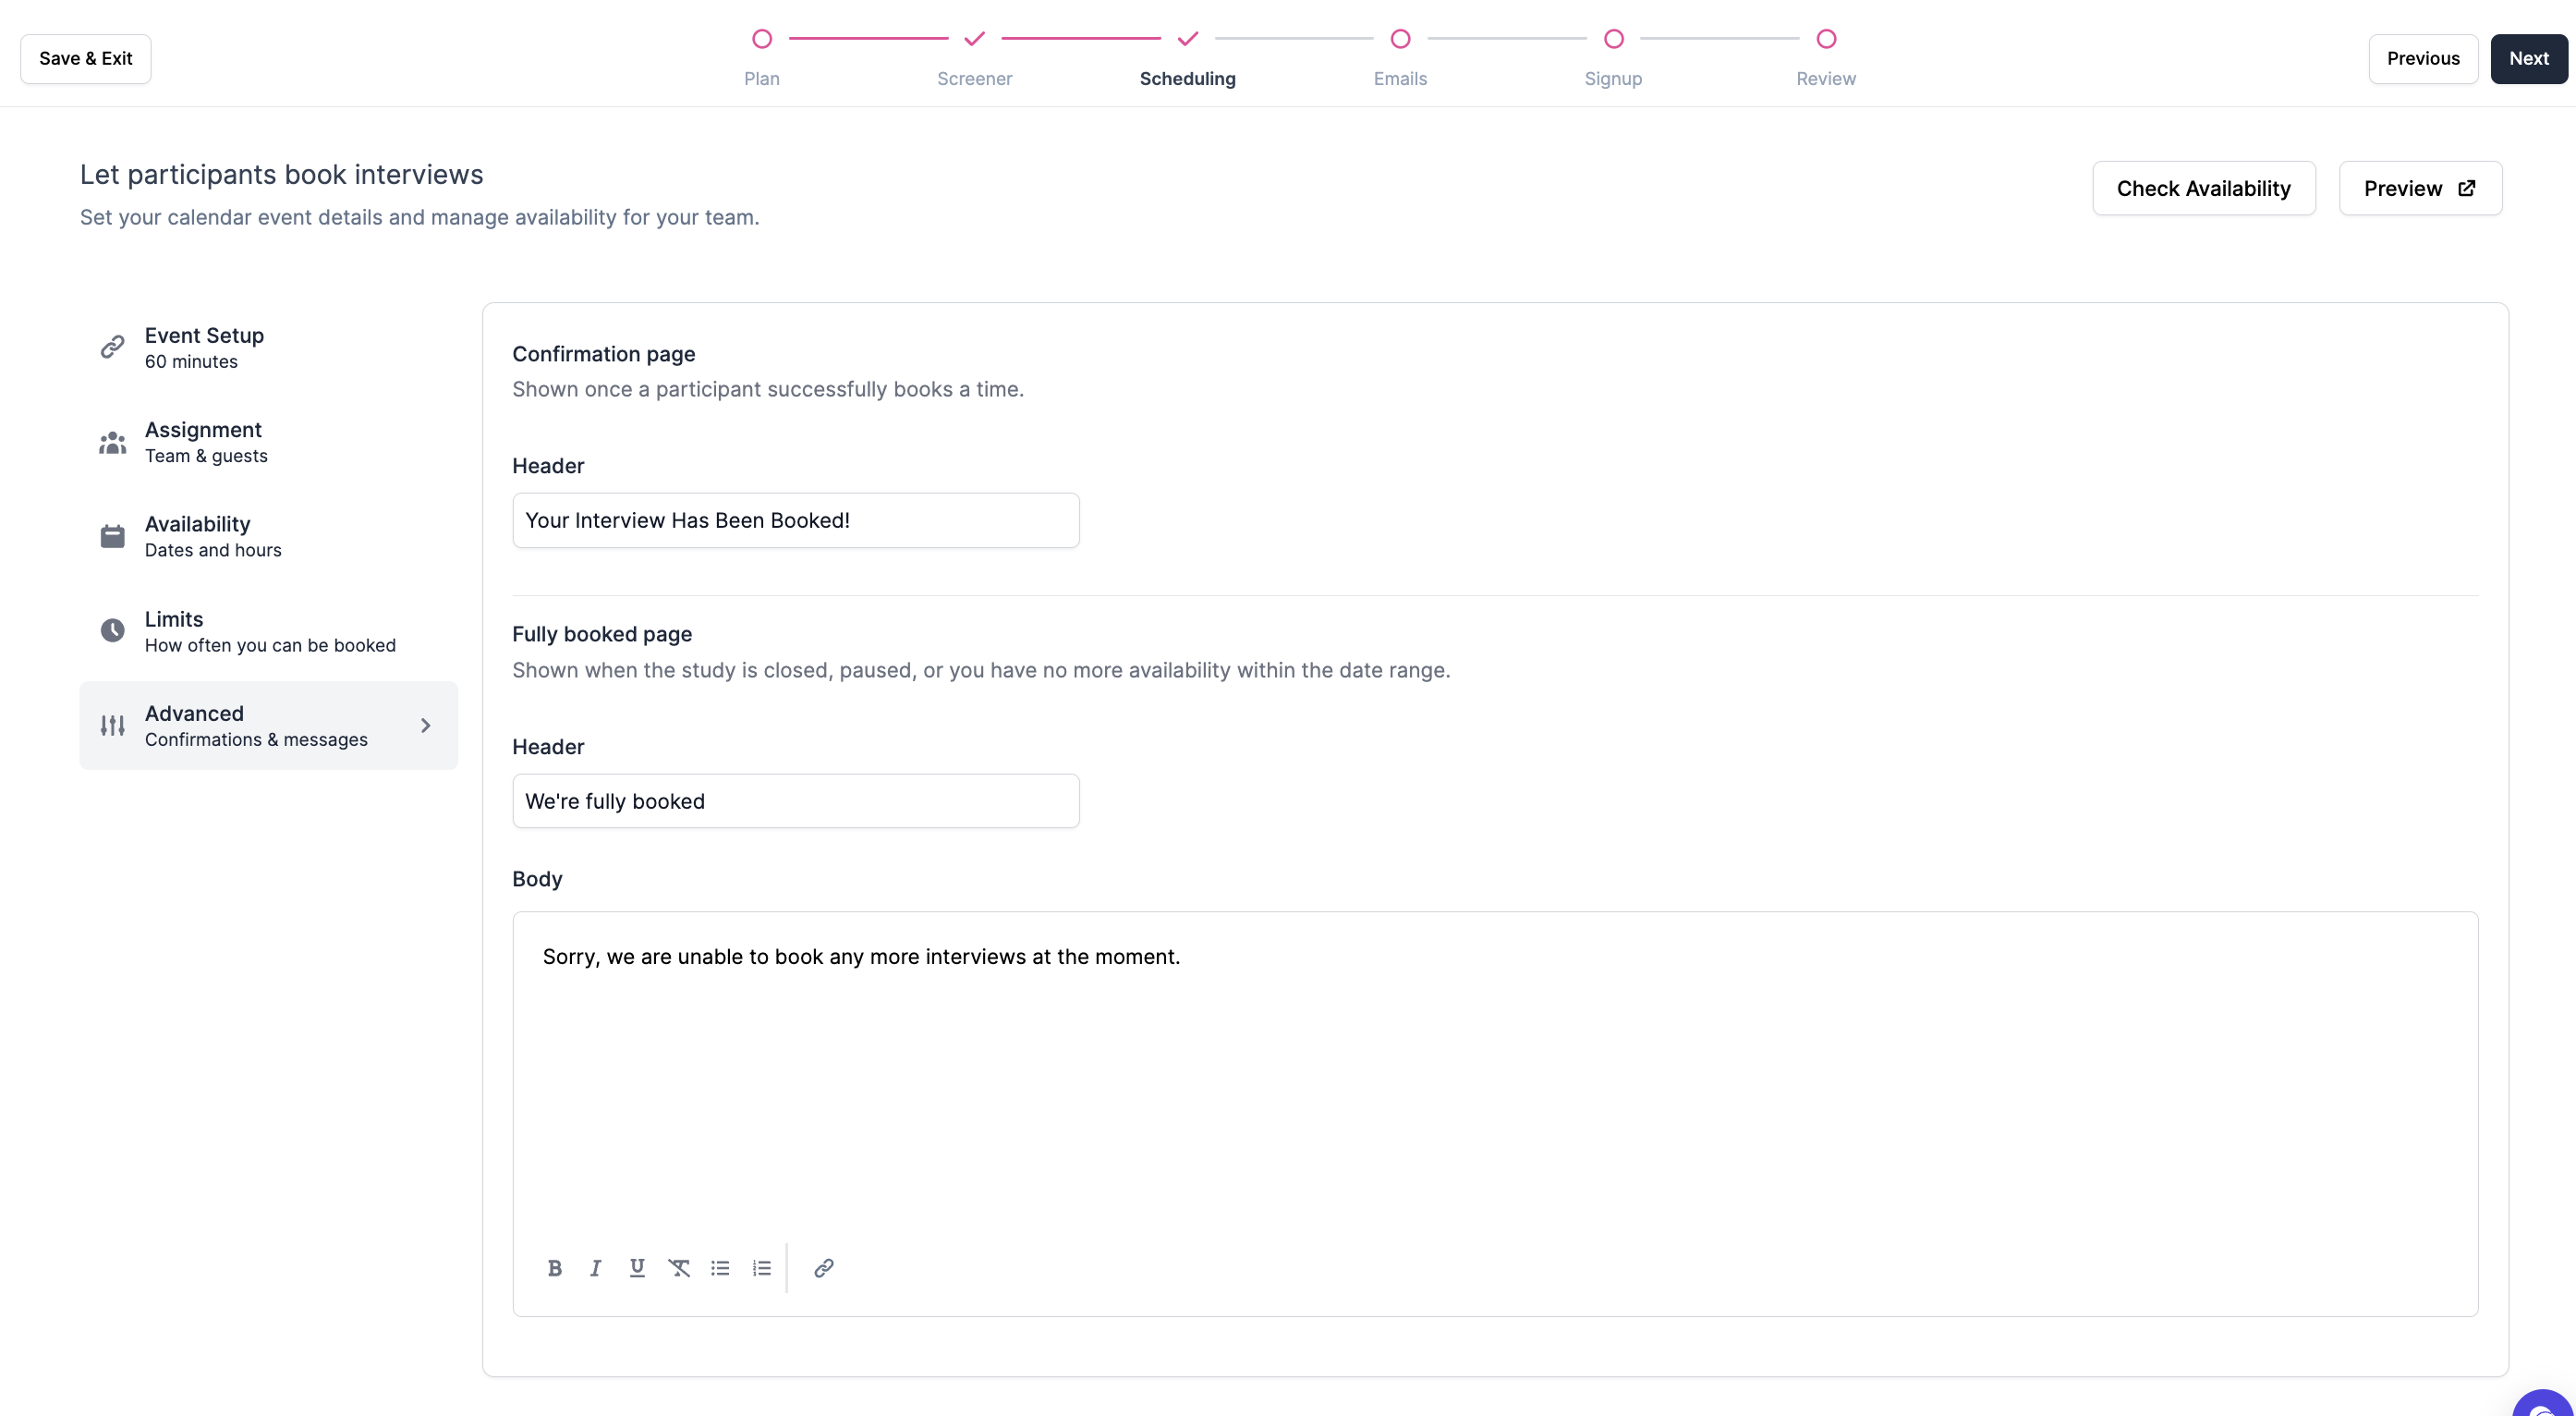
Scheduling
Set your calendar event details and manage availability for your team.
- Event Setup: Choose your preferred calendar app and enter general event details to schedule interviews smoothly.
- Assignment: Add hosts and observers to ensure their availability is considered during interview scheduling.
- Availability: Set specific time slots when interviews can be scheduled based on team availability.
- Limit: Include buffer times and additional parameters to fine-tune the scheduling process.
- Advanced: Customize the participant's view after booking an interview or when the interview time is reached.
Emails
Preparing your emails upfront saves you time and keeps your messaging consistent. You can edit them later as well. You can also select from existing Email Templates.
- Core Emails:
- Study Invitation: Send an invitation to potential participants to participate in your user research study.
- Scheduling Invitation: Invite participants to book a user research interview using the study scheduling tool.
- Incentive Invitation: Thank participants for taking part in the user research study and confirm the incentive details.
- Automated Emails:
- Interview Confirmation: Automatically confirm the interview details to the participant after successful scheduling.
- Interview Reminder: Schedule reminders to participants to ensure they don't miss their upcoming interviews.
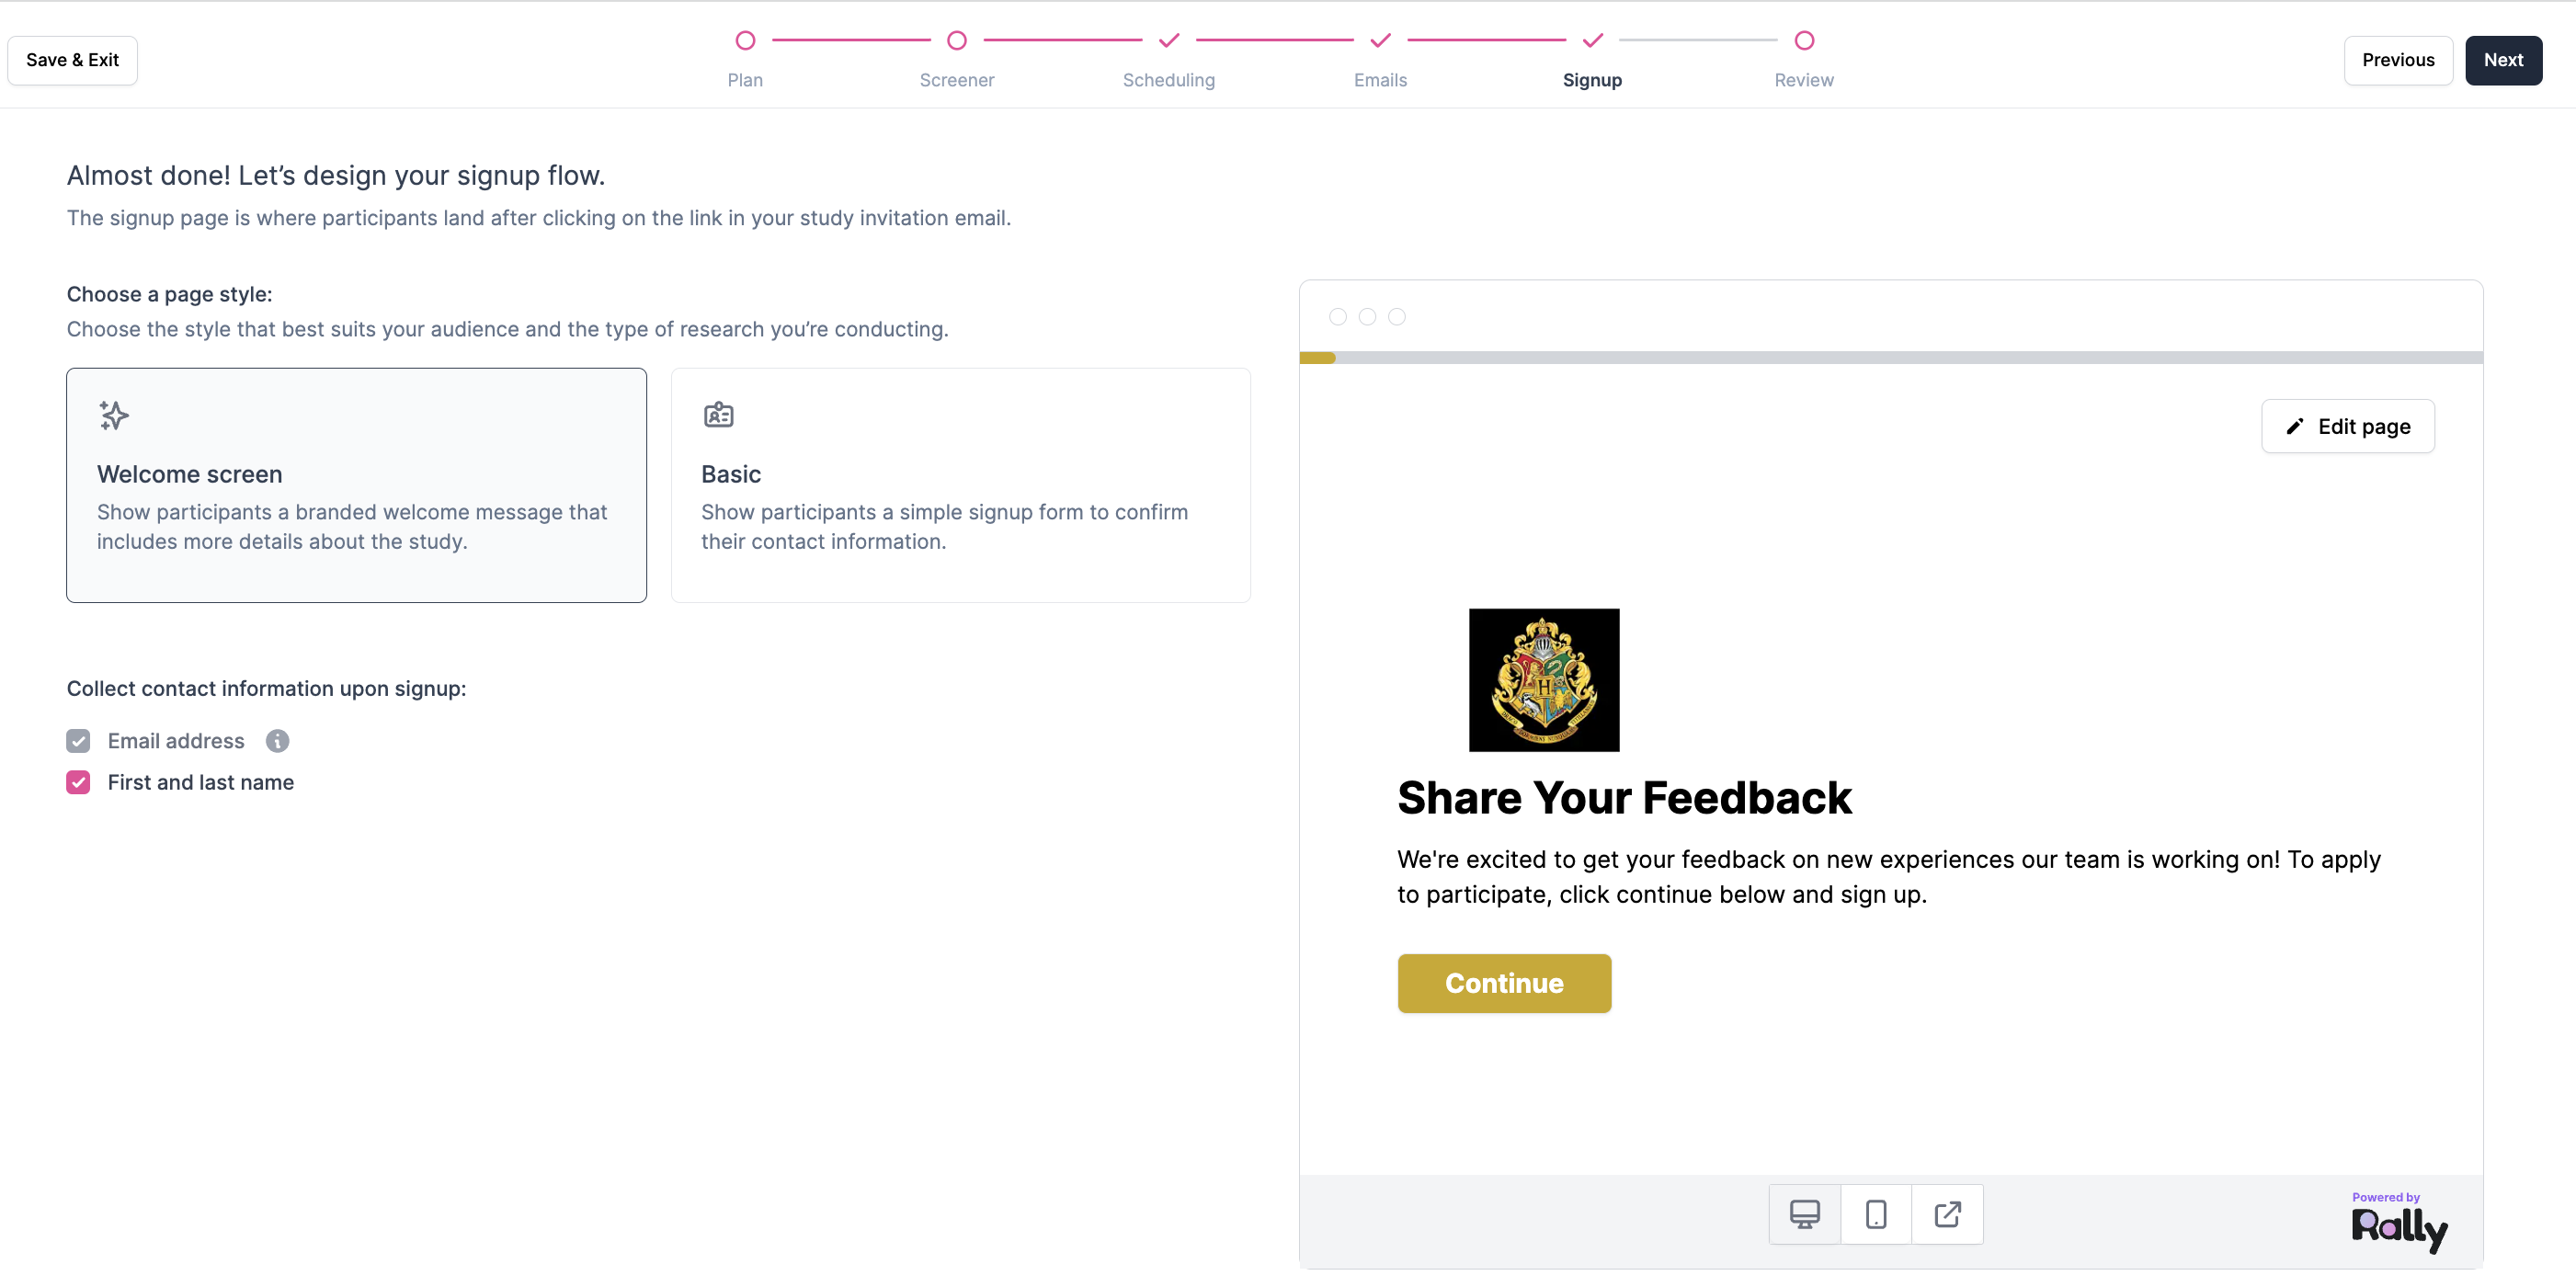
Sign Up
Create a welcome page for Participants.
- Choose page layout:
- Branded: Present participants with a welcoming, branded message that includes study details and more information.
- Basic: Provide a simple signup form to collect participants' contact information.
- Collect contact information: Gather participants' email addresses (required for study participation) and optionally request their first and last names.
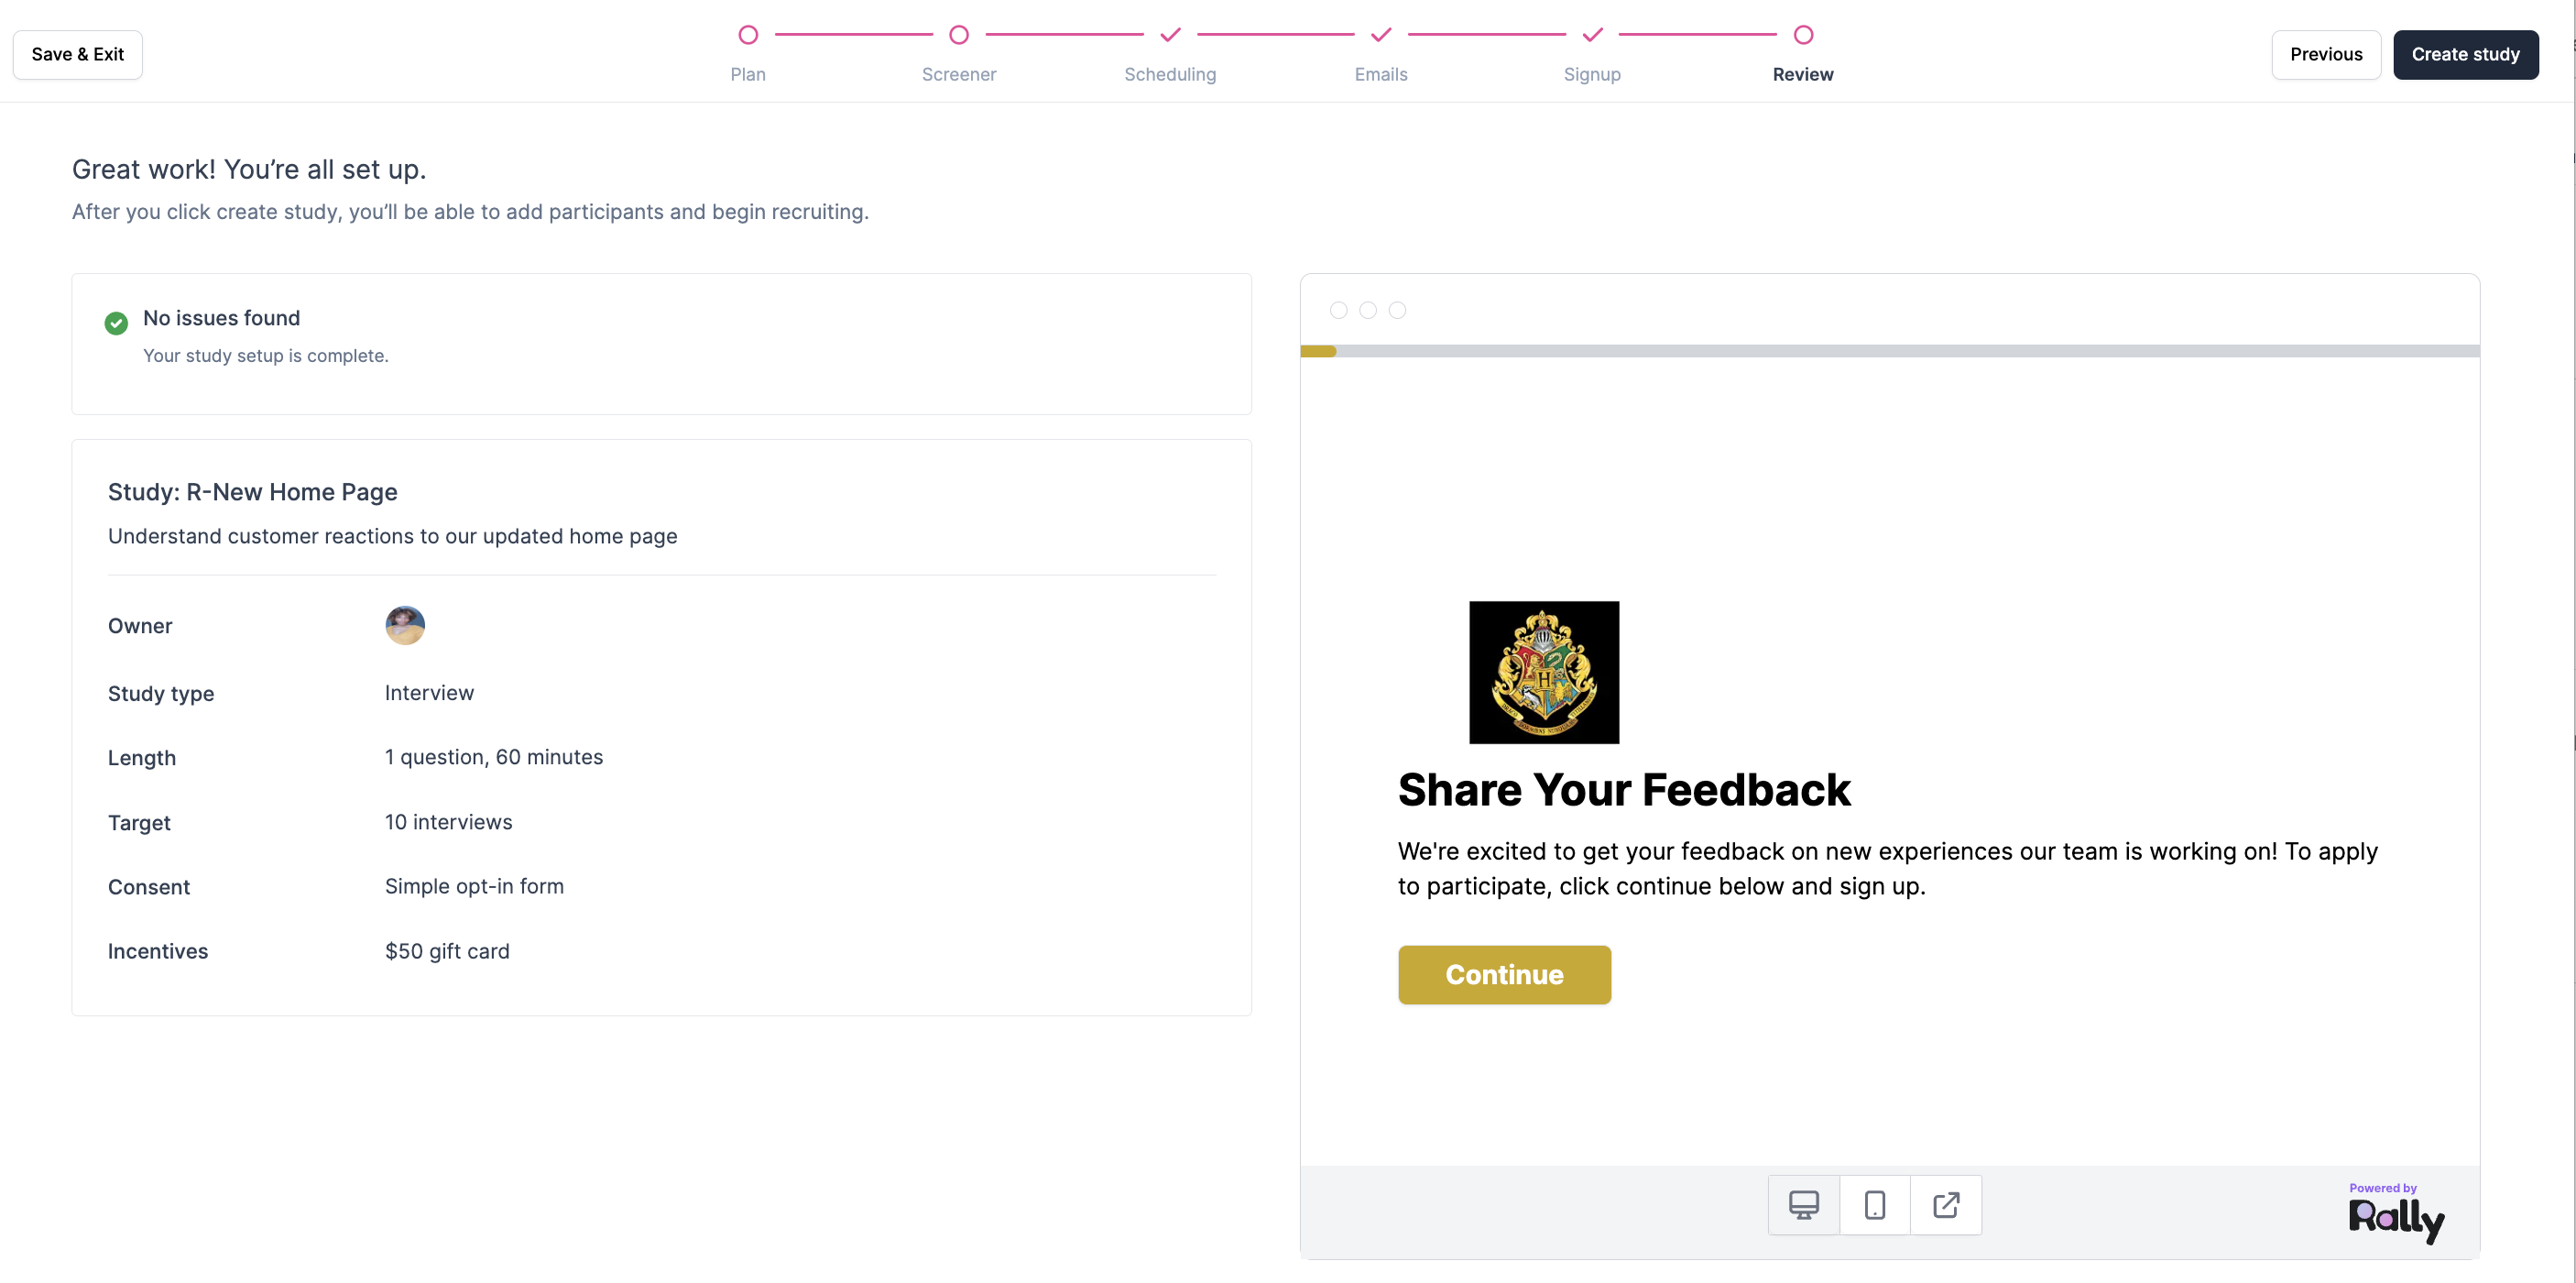
Review
Confirm everything is correct and add any missing info to ensure your study is fully set up.
- Review the components of your study: Check for any errors or missing details in your study setup and make necessary edits. Preview your entire study from the participant's perspective to ensure a seamless experience.
- Click 'Create Study' to launch the Study.
Updated 25 days ago